Search Knowledge Base by Keyword
RentPress Settings
RentPress Settings
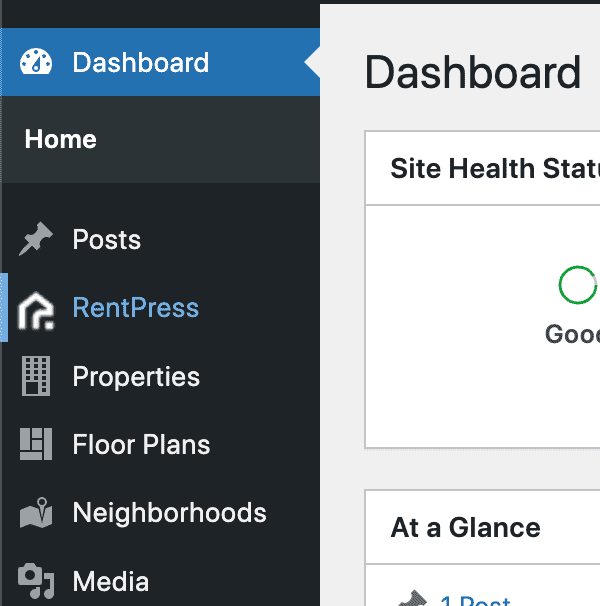
To access RentPress settings, click on RentPress towards the top of your sidebar when signed in to the WordPress admin for your site.
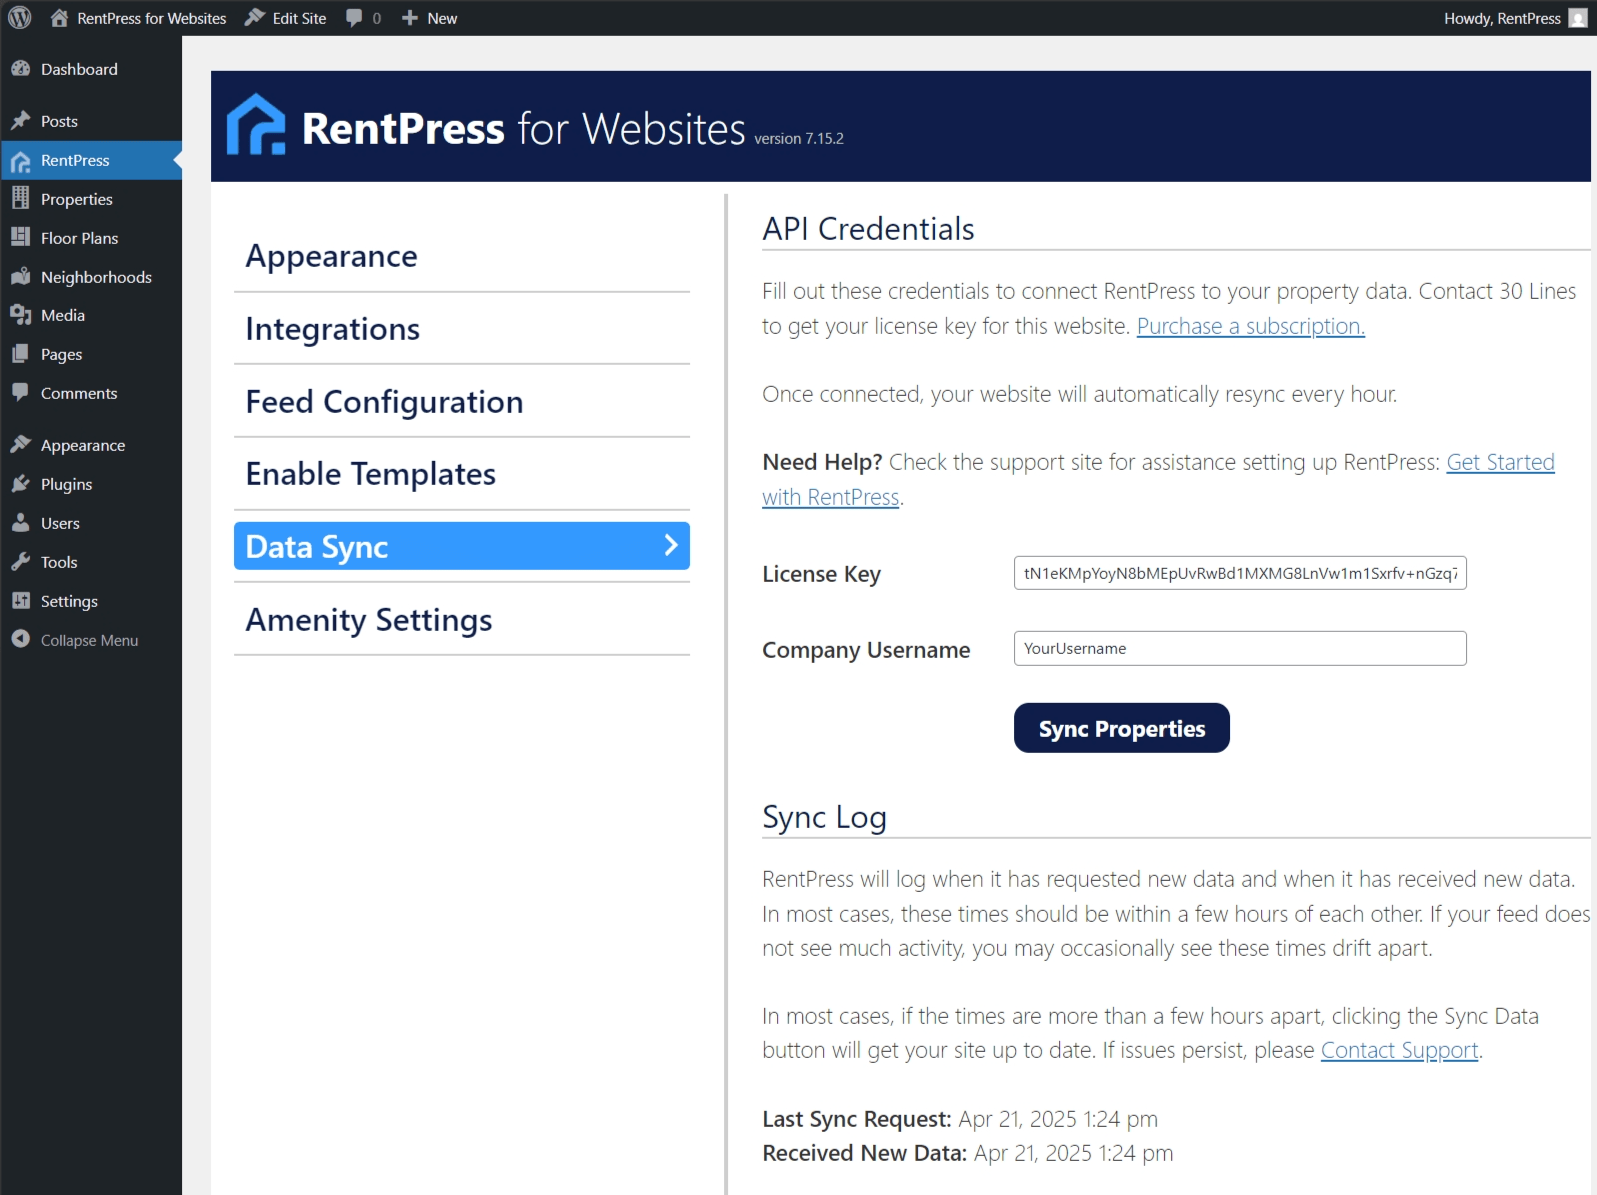
Data Sync
API Credentials
License Key
Required to sync property data. Paste in your RentPress License key exactly as delivered to you.
Company Username
Required to sync property data. Paste in your RentPress username exactly as delivered to you.
Once you’ve filled out these fields, click Save Changes. You can then click Sync Properties to manually request the newest data from RentPress Sync. RentPress will automatically sync your data in the background, so this is usually not necessary past initial setup.
See Also: Connect RentPress License Key and Username – 30 Lines Support
Your license key will only work on the domain it is created for. Should your domain change (including http->https) you will need a new license key.
Appearance
RentPress includes several templates to help get started right away. These templates can be used with static or dynamic property data. Make sure you have added a property to your site. If you would like to use RentPress to build a fully-custom experience for your website, please view the Data Layer and Data Structure page.
These templates are enabled in the RentPress plugin settings: Dashboard > RentPress > Enable Templates. You can then choose to enable each template individually. Alternatively, you can leave any of these disabled if you would like to write your own templates. After making your selections, click Save Changes.
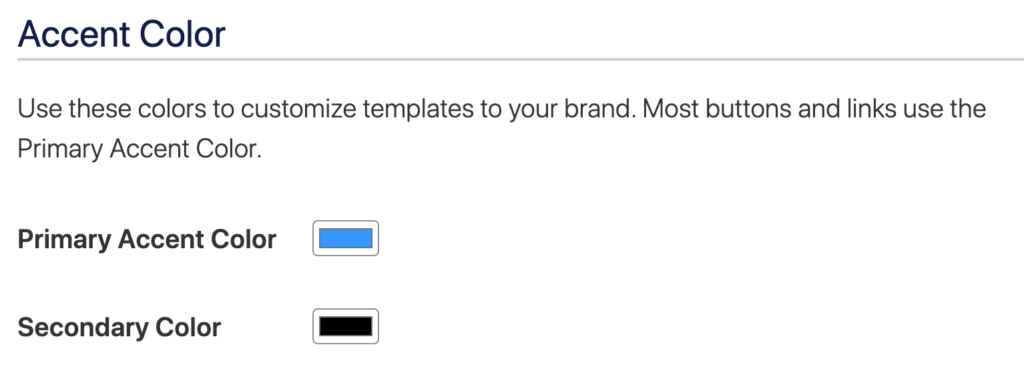
Accent Color
Primary Accent Color and Secondary Color
Used to customize the RentPress templates to your brand. Most buttons and links will use the Primary Accent Color.
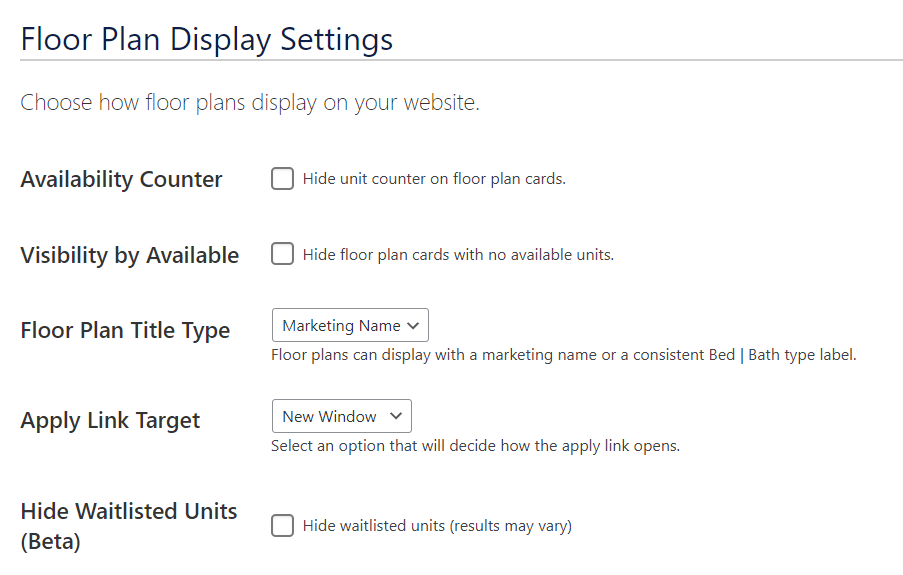
Floor Plan Display Settings
Availability Counter
This setting can be used to hide the availability counter from floor plan grid pages.
Visibility by Available
This setting can be used to show only floor plans that have current availability. Floor plans with no currently-available units will be removed from view.
Note that if the Lookahead option is set to a shorter period, you may see floor plans remove themselves more frequently. Also note that hiding floor plans with no available units means that your site will not show any Waitlist options to visitors.
Floor Plan Title Type
Select an option to determine labels for floor plans. The default option of “Marketing Name” will use the value of each floor plan’s post title – these titles will be written for you when each floor plan is initially synced to your site. The “bed | bath” option will provide consistency by displaying “2 Bed | 1 Bath” or similar on each floor plan.
Apply Link Target
This option lets you choose whether the “Apply Now” button opens in the “Same Window” or a “New Window” (the default setting).
Hide Waitlisted Units (Beta)
This option hides waitlisted units. Results may vary.
Pricing Display Settings
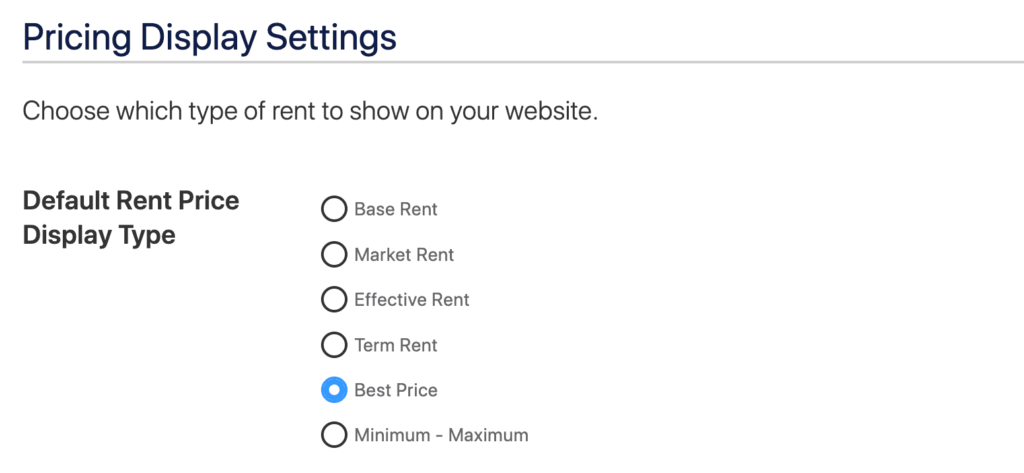
Default Rent Price Display Type
Since a unit can have multiple prices, choose an option that fits which price to display. Results will vary based on capabilities of property data source. The default “Best Price” will select the lowest price of all non term rent prices. If your property or properties have term rents, then you should select the Term Rent option.
Note that you can visit each property to choose the price display type that best fits each property’s needs which will override your choice on this option when set. Each value will be displayed at a property and floor plan level and you can choose to individually override those values there.
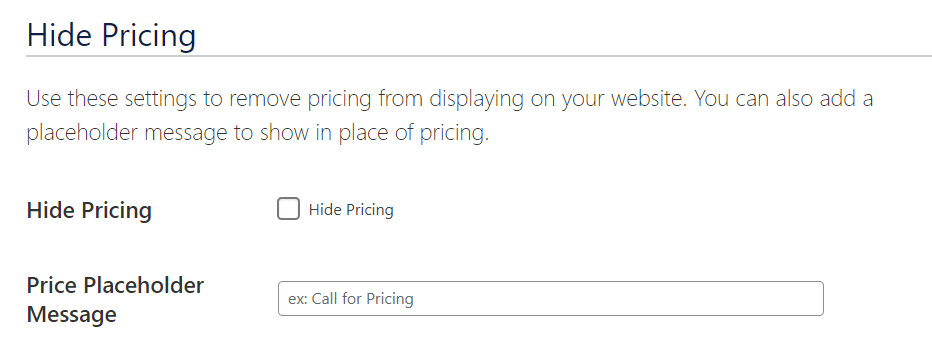
Hide Pricing
Hide Pricing
You can elect to hide pricing across the entire site. This typically is only necessary when the data feed is experiencing an issue.
Note that this option supersedes all other price options and values. When enabled, no prices will display to visitors to your site.
Price Disabled Message
This option can be used to display a message when the price is disabled.
Deposit Settings
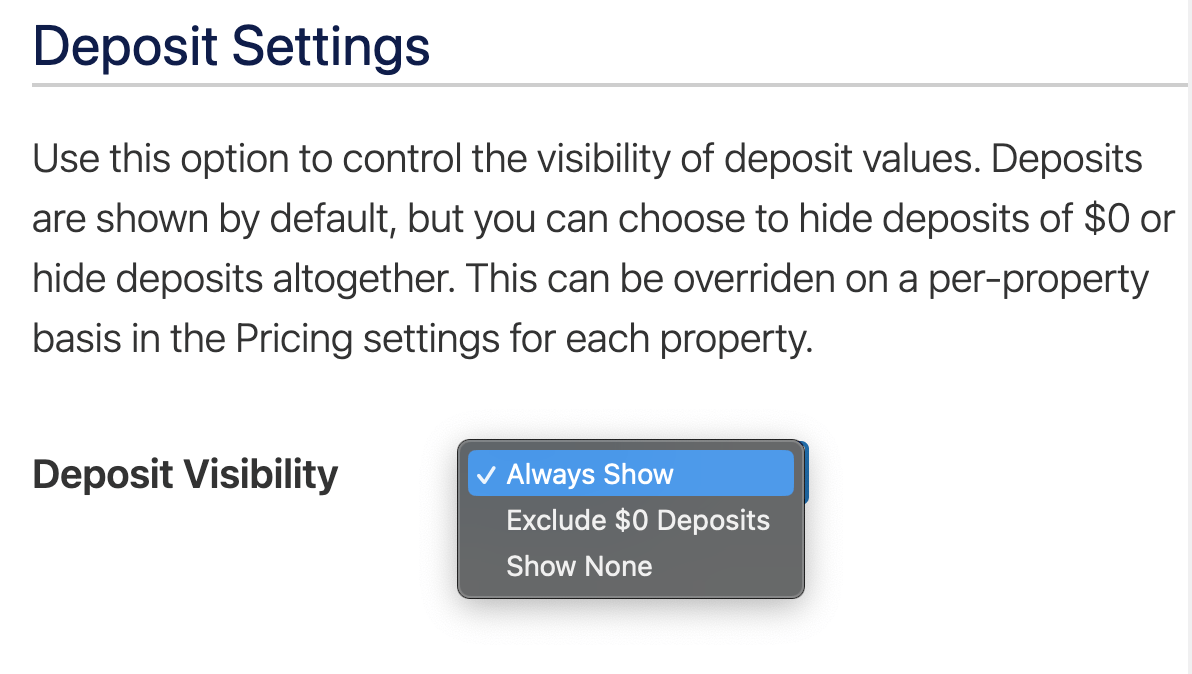
Deposit Visibility
Select an option to customize the visibility of deposits on the floor plan page. This option can also be overridden on a per-property basis in the Property Pricing editor and deposit values can be adjusted at each floor plan in the Floor Plan Pricing Editor.
Format Phone Numbers
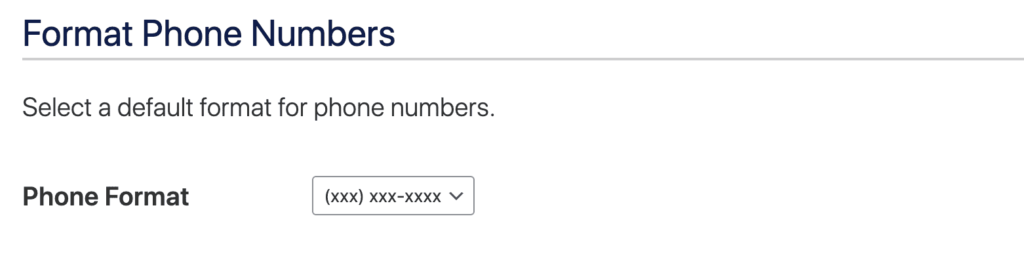
Phone Format
Select an option to show phone numbers in a consistent format across each property’s page.
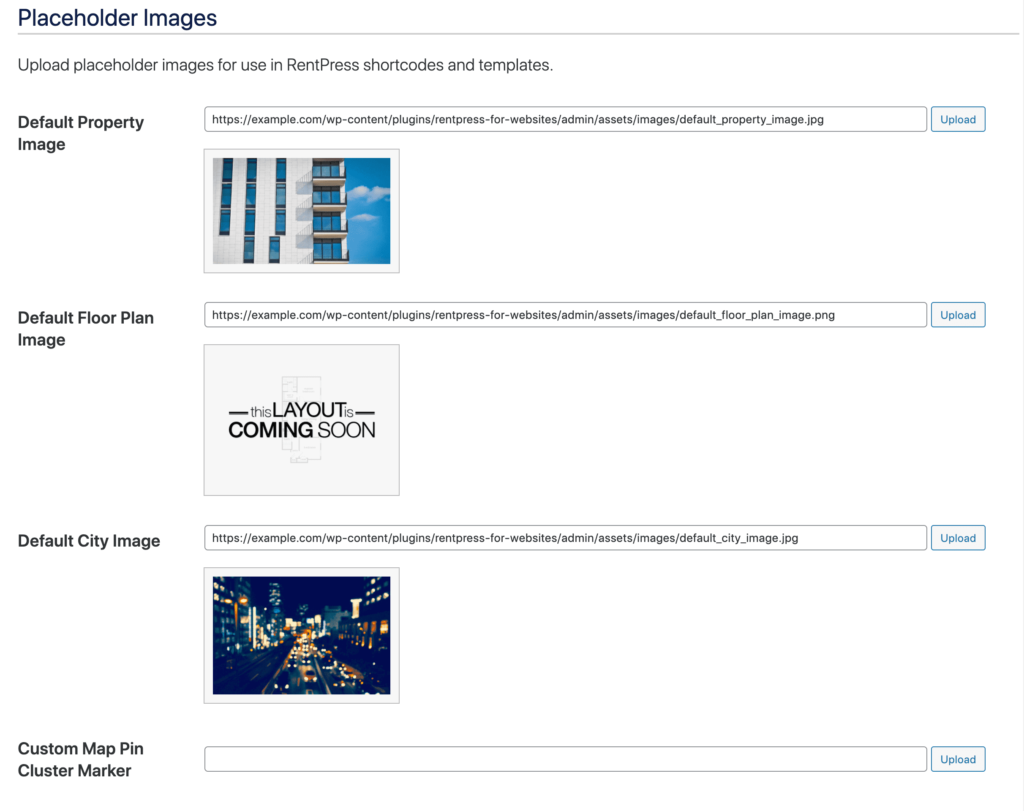
Placeholder Images
Default Property Image
This image will be used as the “hero image” on the Property Listing pages. This image will also be used as the thumbnail for the property around the site including on the Properties Grid search page, [property_grid] shortcode, and more. A property image is generally not included in any data import source, so it is recommended to set featured images for your properties. Hero images will generally be displayed at a maximum height of 600px and we recommend no wider than 1920px for best website performance.
Learn more about adding content to properties.
Default Floor Plan Image
This image will be used as the thumbnail image representing any floor plans without images set. We recommend images with a square 1:1 aspect ratio, and no larger than 500x500px.
Learn more about adding content to floor plans.
Default City Image
This image will be used on all Cities pages where an image is not set. This image will be used as a background image fullwidth banner on individual /cities/ pages and as a thumbnail representing the city elsewhere on the site. We recommend an image size between 640x480px and 1920x1080px.
Learn more about adding content to Cities pages ⇾.
Custom Map Pin Cluster Marker
Set an image here to use on a Google Map showing multiple properties in a cluster.
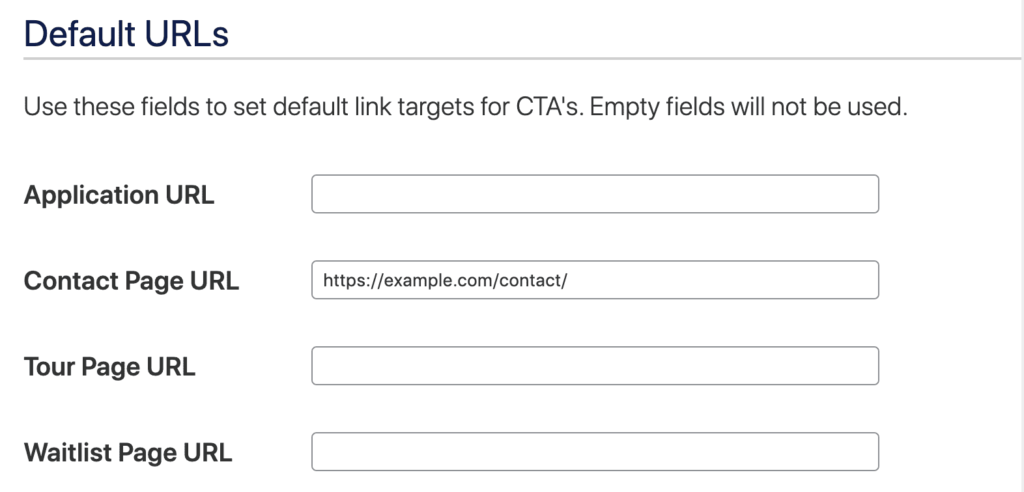
Default URLs
Use these fields to set default link targets for CTA’s. Empty fields will not be used.
Application URL
Your website may have only one place to send shoppers to an online application. This option is meant to be used for those instances and should be used to override any application links imported from a data feed.
Contact Page URL
Choose the destination URL for the Request Info buttons. This field allows you to enter the entire URL of where you would like to send shoppers seeking more info. On a default configuration, RentPress’s included templates will send shoppers to a /contact/ page on your site where it is expected that you have added a form. This can also be configured on a per-property basis in the Contact Form section of the Property Editor.
See also: RentPress Gravity Forms Add-on
Tour Page URL
If you are using an online tour scheduler on your website, add the entire URL you would like to send customers to so that they can schedule a tour. When this field is populated with a URL, the Schedule Tour button will be displayed.
Waitlist Page URL
If your property allows shoppers to join a waitlist, add the entire URL you would like to send customers to so that they can join your waitlist. When this field is populated with a URL, the Join Waitlist button will be displayed on floor plans with no available units. Note that if you have enabled the “Hide floor plans with no available units” option, the Join Waitlist button is not going to display.
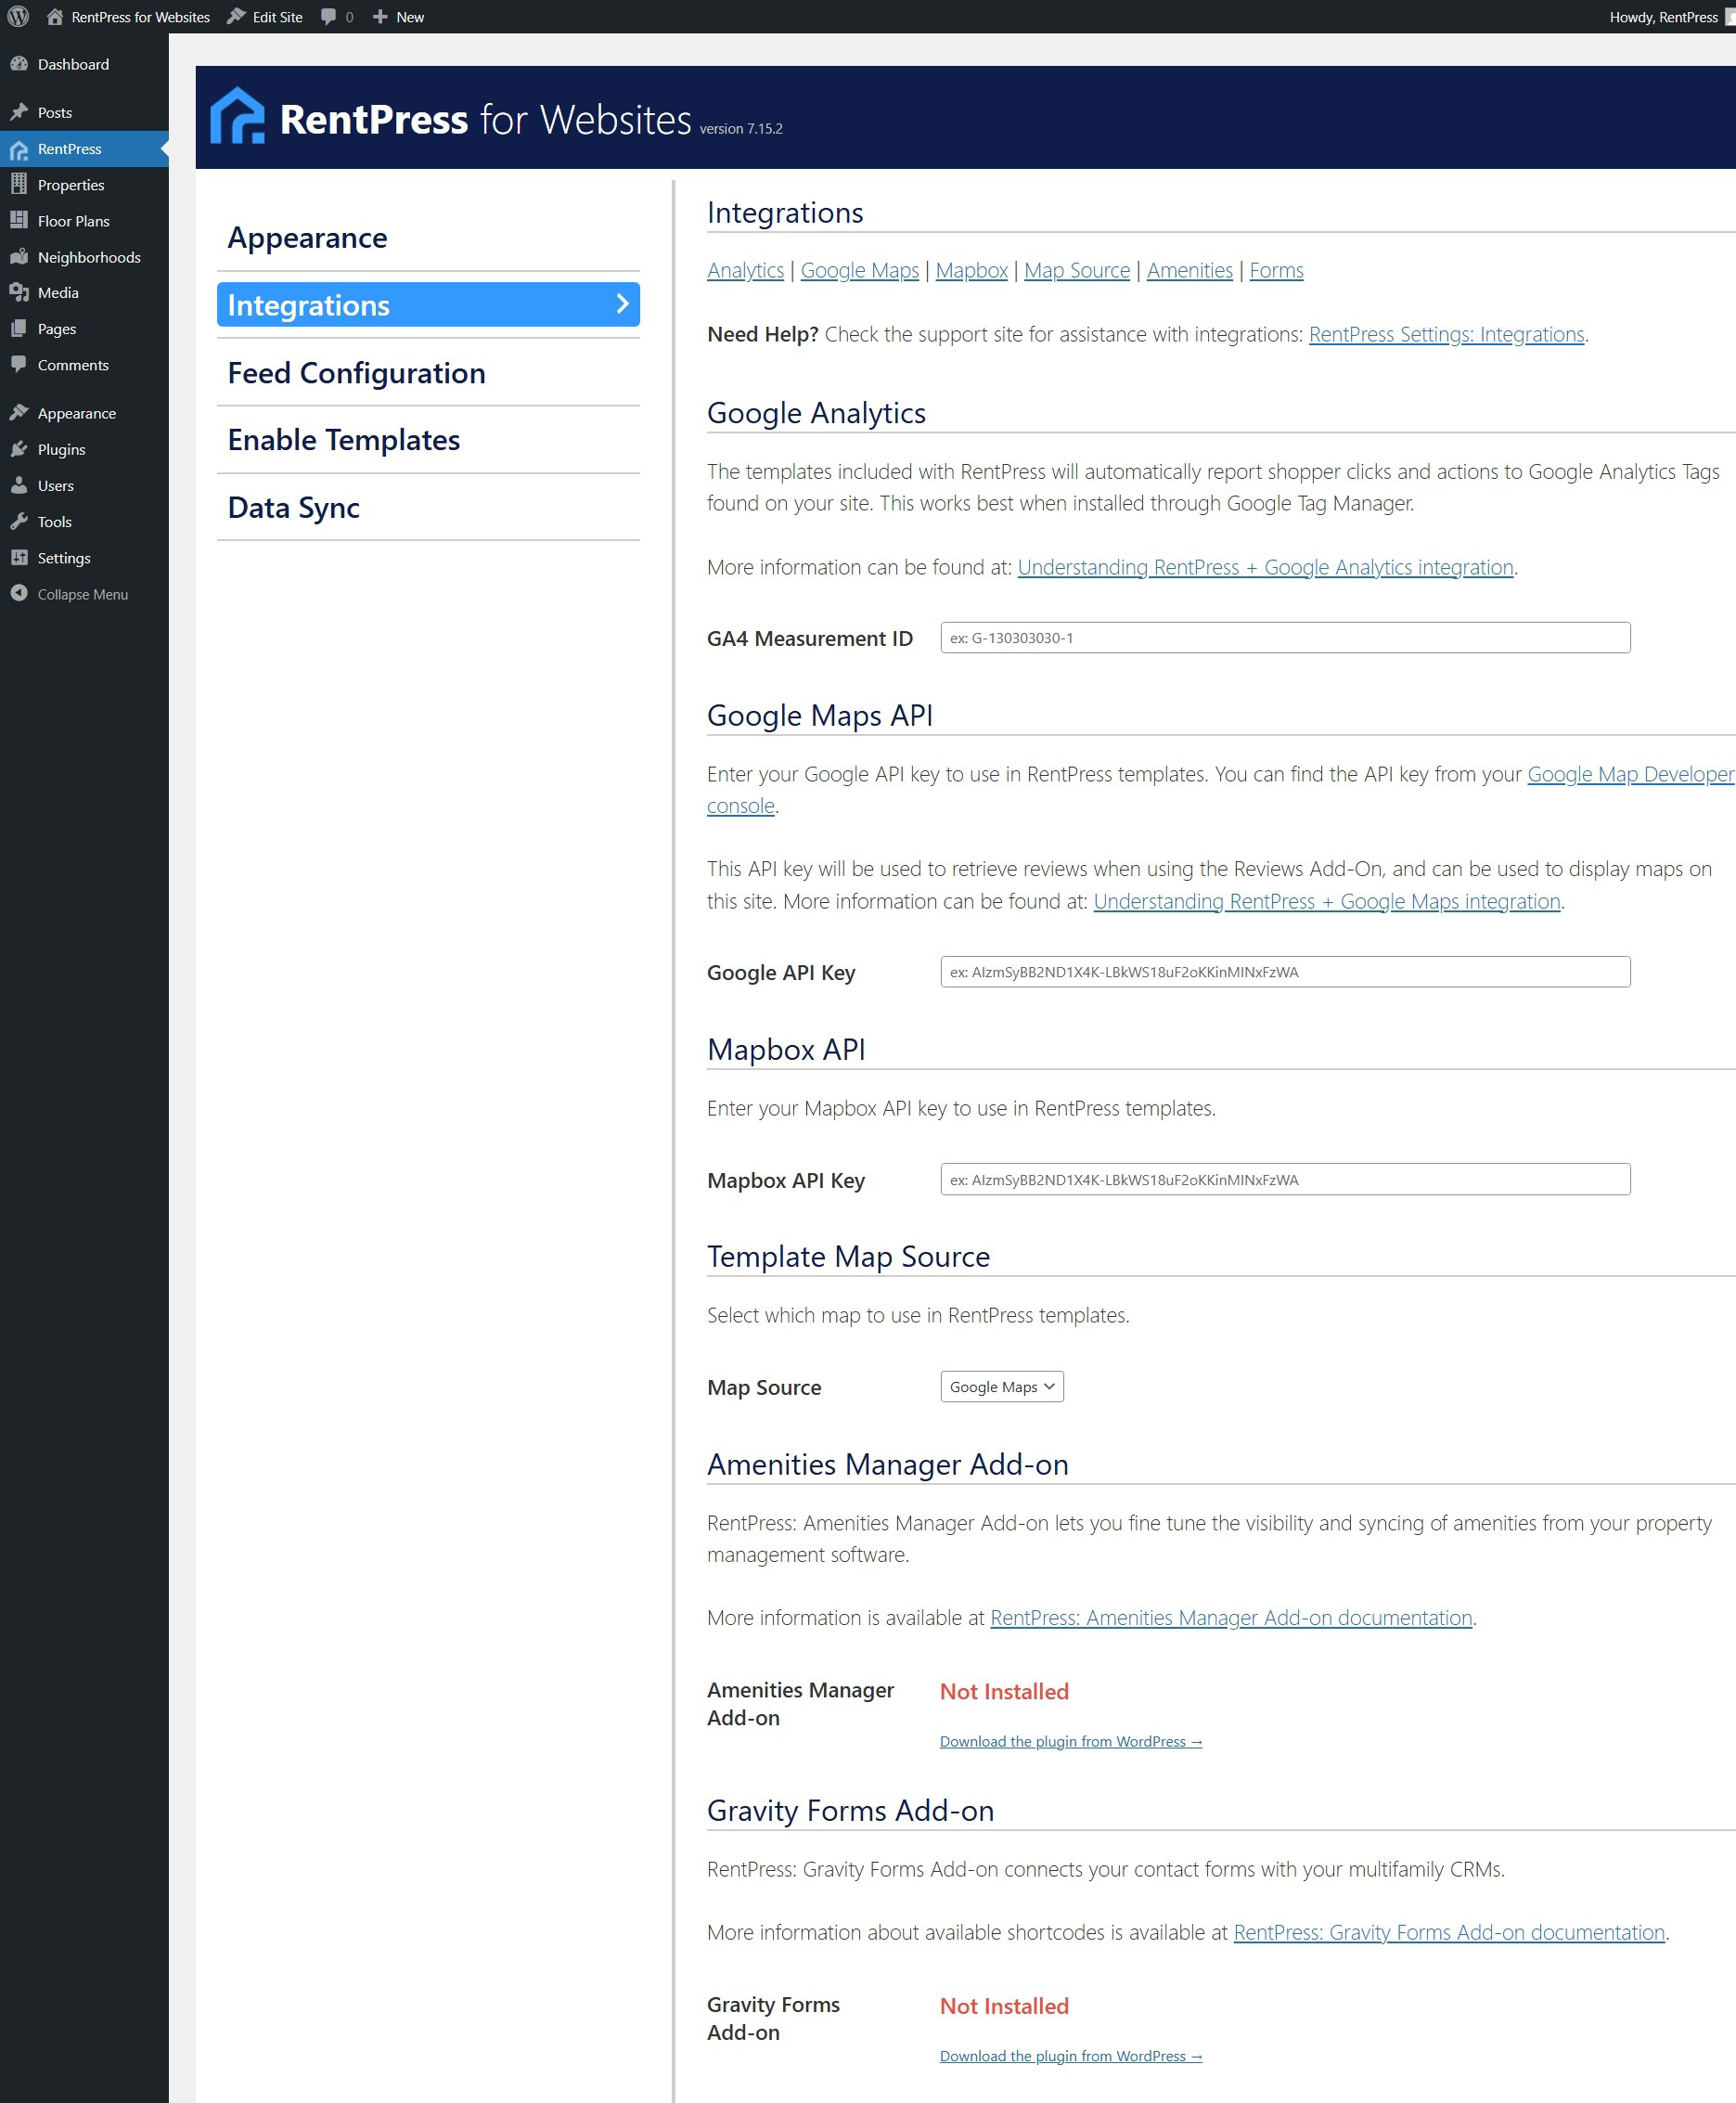
Integrations
RentPress offers integrations with several outside services. In some cases, you will need to configure how these integrations work on your site.
After making your selections, click Save Changes.
Google Analytics
When connected, shopper actions on RentPress templates will be automatically reported into your Google Analytics account. Events will start appearing once your Measurement ID is entered.
Note that regardless of the chosen method of installing Analytics to your site, you must add your ID here so that RentPress can report visitor actions and events.
GA4 Measurement ID
Enter your Measurement ID in this field to let RentPress report to your Analytics dashboard.
For more info, including specifics about what events are reported, see Understanding RentPress + Google Analytics Integration.
Google Maps API
If you want to display a Google Map on your property search or property single template, use these settings to configure your site with the Google Maps API. RentPress uses the Google Maps Javascript API. For more information about how this works, visit Google’s documentation about the Maps API ↗.
Before you start using the Google Maps API, you need a project with a billing account and the Google Maps API enabled. For best results, you’ll want to enable access to the following:
- Places API
- Maps JavaScript API
- Maps Embed API
- Geocoding API
To learn more, see Get Started with Google Maps Platform ↗️.
Google API Key
This key is required to access the Google API and retrieve maps information. You can find the API key from your Google Map Developer console.
Mapbox API
Mapbox API Key
Enter your Mapbox API key to use in RentPress templates. You can get more information here about Mapbox Access Tokens. Use of Mapbox in RentPress templates requires entering your access token.
Template Map Source
Map Source
Select which map to use in RentPress templates. Default option of Google Maps can result in faster site speed.
Amenities Manager Add-on
RentPress: Amenities Manager Add-on lets you fine tune the visibility and syncing of amenities from your property management software.
More information is available at RentPress: Amenities Manager Add-on documentation.
Gravity Forms Add-on
RentPress: Gravity Forms Add-on connects your contact forms with your multifamily CRMs.
More information is available at RentPress: Gravity Forms Add-On.
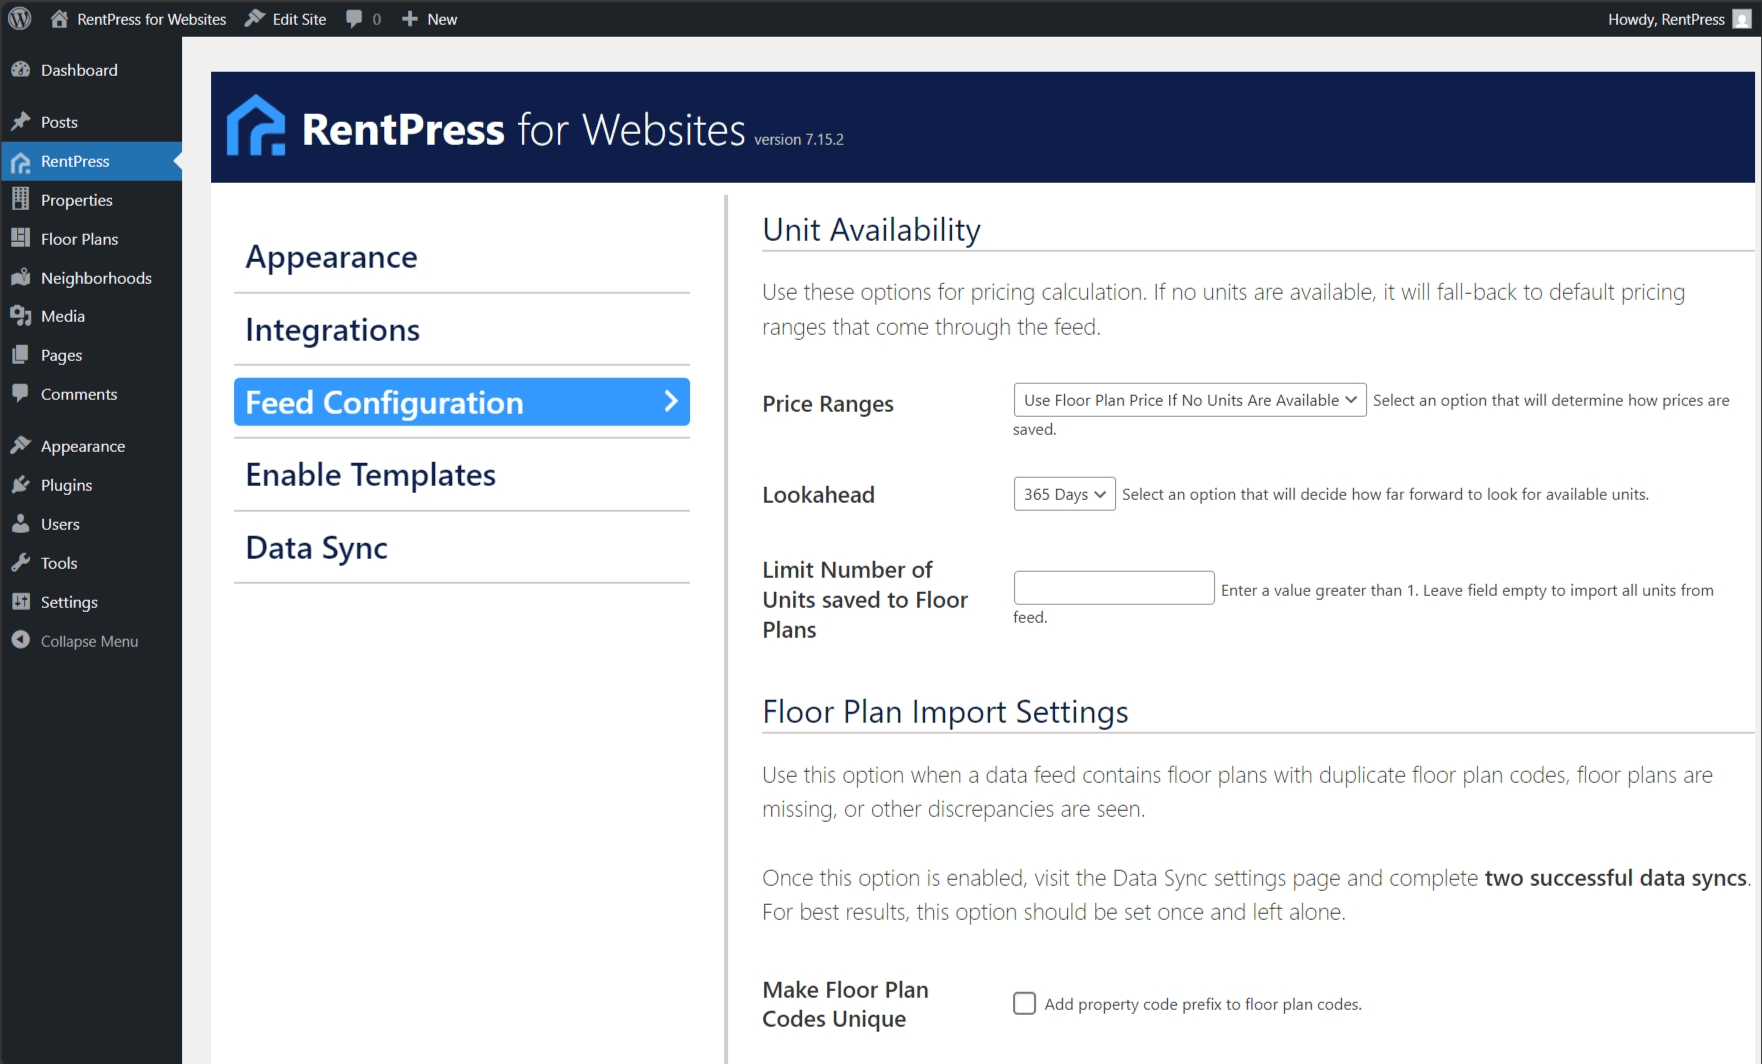
Feed Configuration
RentPress provides several options to configure global choices for your property data.These options are global, and meant to be used with dynamic property data, but can also be used towards static property data. Make sure you have added a property to your site.
If you would like to use RentPress to build a fully-custom experience for your website, please check out the follow the How to Build Custom Templates with RentPress Data article.
After making your selections, click Save Changes.
Unit Availability
Price Ranges
Select an option to determine how price ranges are saved. “Use Available Unit Price Only” should be used if you want your website to show pricing only as it currently is in the feed. “Use Floor Plan Price Only” can be used if your pricing feed includes floor plan pricing. The default option of “Use Floor Plan Price If No Units Are Available” will use the current price when provided, and will use the last-known price for ranges.
Lookahead
Select an option that will decide how far forward to look for available units. If a unit’s date falls outside this window, it will not be displayed. Results will vary based on capabilities of property data source. It’s best to think of this option as a way to limit data imported to your site – if your feed does not include data going out to 90 days, we won’t be able to import it.
Limit Number of Units saved to Floor Plans
If your feed is listing more units per floor plans that you would like to display, you can enter a number here. If this field is empty (the default behavior), then all units in the feed will be imported to your site.
Floor Plan Import Settings
Make Floor Plan Codes Unique
Use this option when a data feed contains floor plans with duplicate floor plan codes, floor plans are missing, or other discrepancies are seen.
Once this option is enabled, visit the Data Sync settings page and complete two successful data syncs. For best results, this option should be set once and left alone. Note: Once enabled, this change is not reversible for existing floor plans, as it adds a prefix to floor plan codes. Existing codes will need to be manually edited or removed and then re-synced.
Enable Templates
RentPress Templates
RentPress includes several templates to help get started right away. These templates can be used with static or dynamic property data. You can then choose to enable each template individually. Alternatively, you can leave any of these disabled if you would like to write your own templates. After making your selections, click Save Changes, then click the “Add Theme Files” button.
When you click on “Add Theme Files” the RentPress-provided templates for your selections will be added to your theme. Page templates can then be assigned to your site’s pages. Post and Term templates will be automatically applied by WordPress.
On rare occasions, the templates will not appear after being added. Try Refreshing Permalinks in these cases.
To learn more about using and customizing included templates for your apartment website, see Templates Explained »
Property Search (Basic)
Adds the basic property search page template. Offers a pared-down and simplified search experience.
Property Search (Advanced)
Adds the advanced property search page template. Brings more features like a map, per-bedroom pricing, and pre-populated pet filters.
Property Single
Adds the single property post template.
Floor Plan Search
Adds the floor plan grid template to display all floor plans on your website.
Floor Plan Single
Adds the single floor plan post template.
Cities Grid
Adds the cities grid page template.
City Page
Adds the property taxonomy “City” term template.
Neighborhoods Archive
Adds the neighborhoods archive grid page template.
Neighborhood Page
Adds the Neighborhood post single template.
Amenity Page
Adds the property taxonomy “Amenity” term template.
Feature Page
Adds the property taxonomy “Feature” term template.
Pet Page
Adds the property taxonomy “Pets” term template.
Property Type Page
Adds the property taxonomy “Property Type” term template.
Property Taxonomies
Adds all property taxonomy templates.
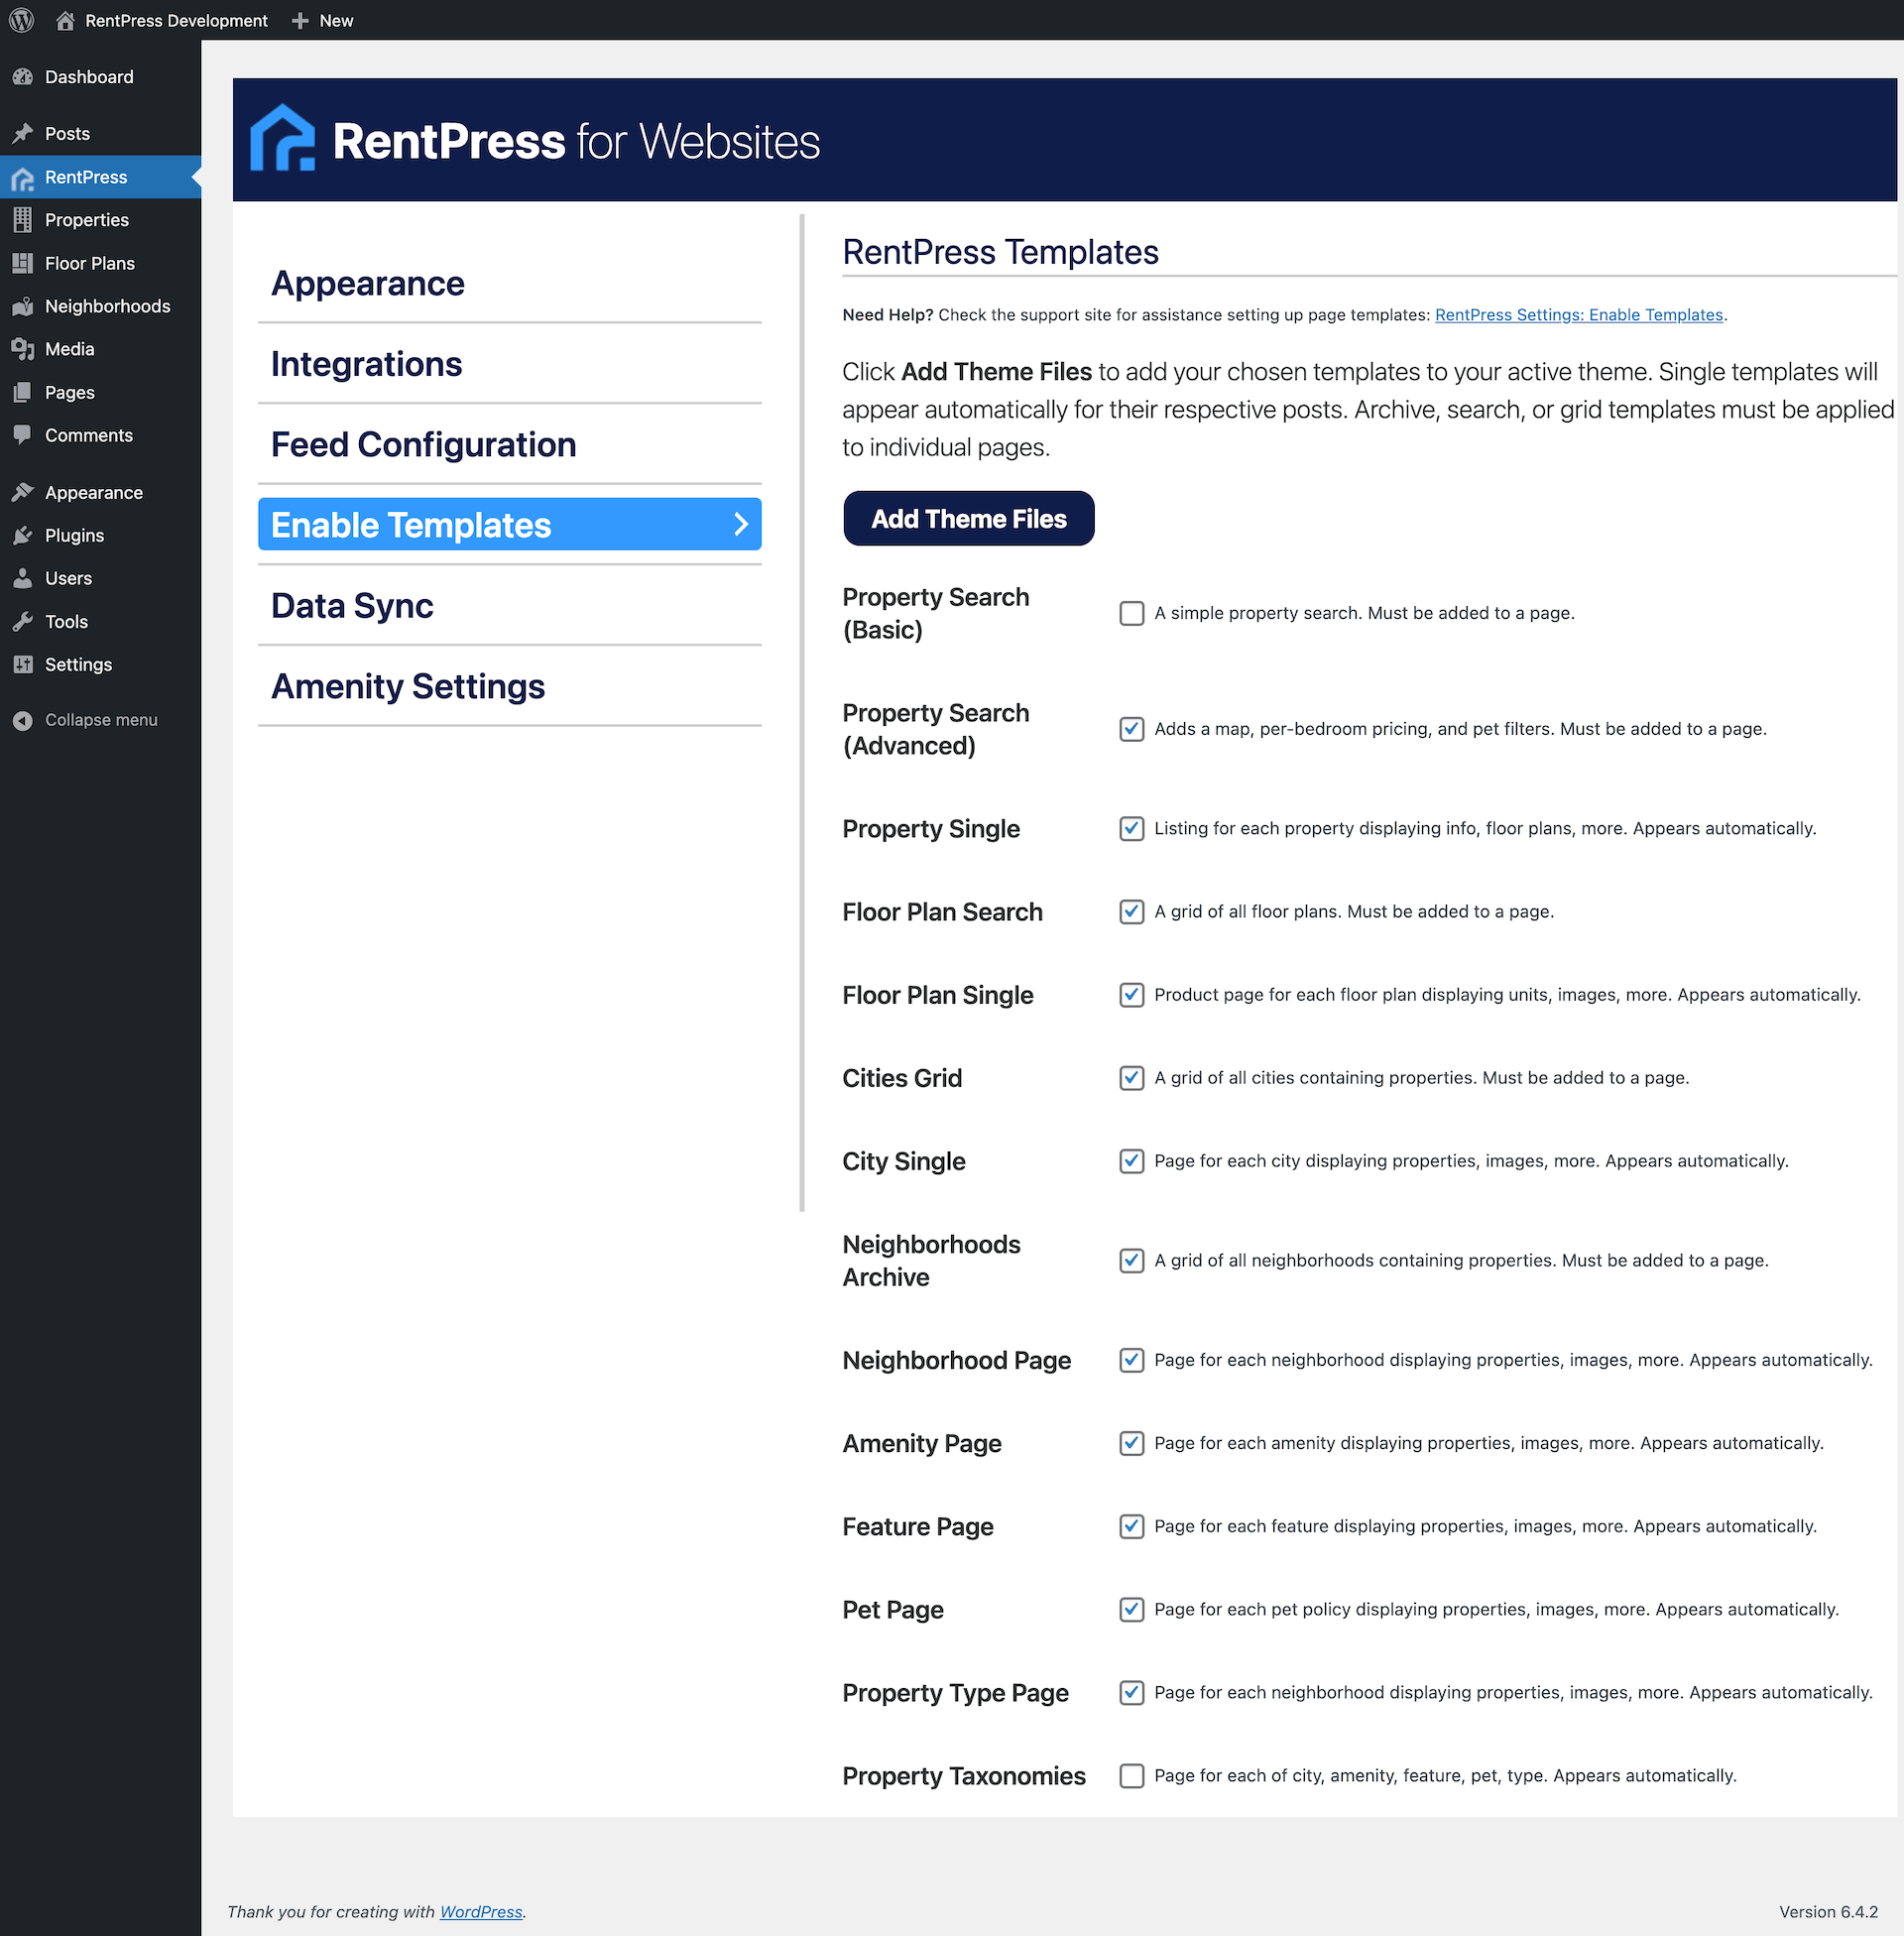
We recommend using these RentPress templates.