Search Knowledge Base by Keyword
How To Add a Property Manually
RentPress is commonly used to automatically create and update property information based on a property management software feed. You can choose to create properties manually either entirely or in addition to feed-connected properties.
This article with outline the steps for manually creating a property, starting with the requirements and then outlining what is recommended for the best experience.
Add New Property
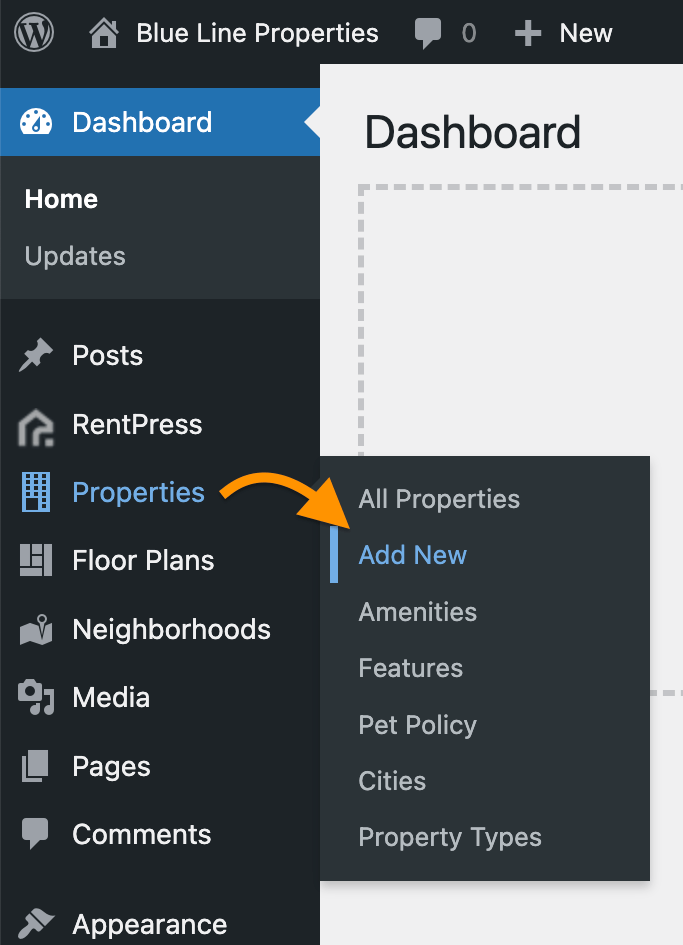
From your WordPress dashboard sidebar, mouse over Properties, then Add New.
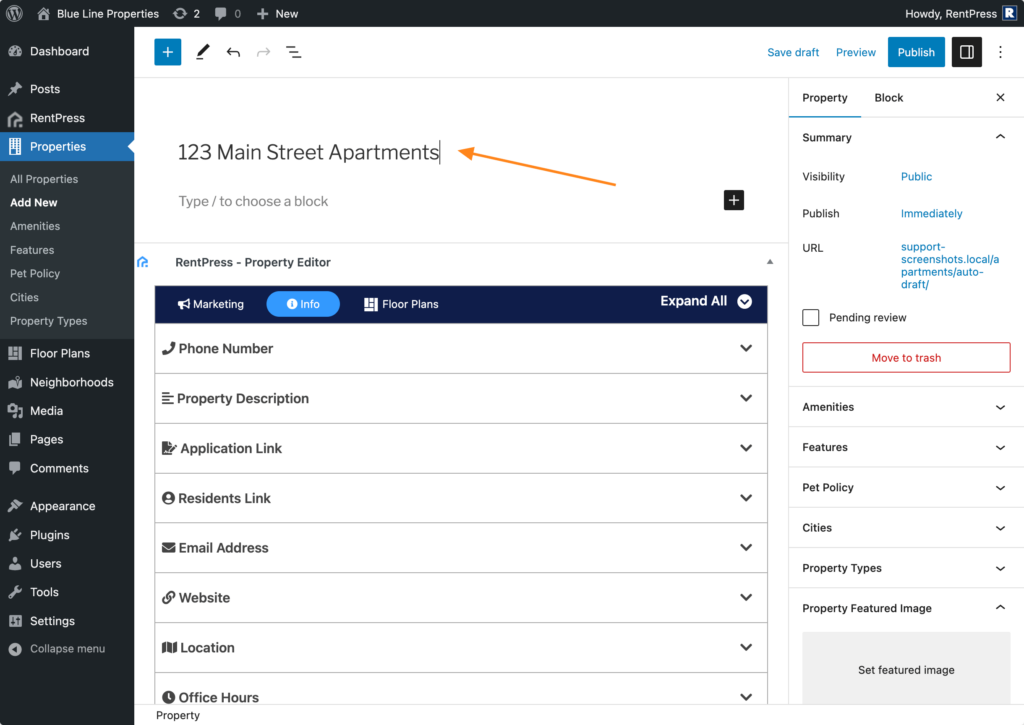
You’ll be brought to the property post editor screen where you can add information about your property.
Property Post Editor
The property editor consists of three tabs: Marketing, Info, and Floor Plans. The Info tab will be where you’ll need to enter most information. The Marketing tab houses fields where you can add additional content. The Floor Plans tab will list out information about this property’s floor plans once they are added.
Additionally, you’ll find WordPress data points for Amenities, Features, Cities, Pets, Property Types, and Property Featured Image.
For detailed information about each section, see Property Content Fields
Required Information
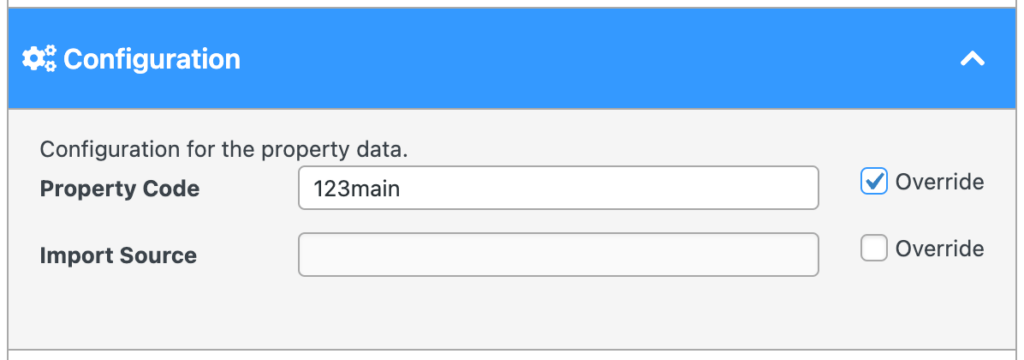
For RentPress to know about your property, you must add a Property Code in Info > Configuration. Click the override checkbox next to the field and type in a property code. This code can be anything consisting of numbers, letters, and hyphens. Do not add any spaces, commas, or other special characters. The property code must also be unique to this property on your website (if your website has multiple properties).
At the top of the screen, you’ll also want to add a title – or name – to your property.
Once you save, your title will be automatically written into the URL (if your site is set to use Post Name “pretty” Permalinks ↗). You can instead choose to write your own URL for this property.
This is the minimum amount of information needed for RentPress functionality to work. At this time, you can Publish your property (especially if you’re working in a staging environment), or choose Save Draft to save your progress so far.
Adding More Info
To make sure you’re getting the most out of your manually-created property, you’ll want to add other information as well. For tips, details, and more, please see Property Editor and Content Fields. We will cover a few basics here that you won’t want to miss.
- Property Featured Image: This “hero” image will be used to represent your property in Property Search pages, Property Listing pages, landing pages like City Pages, and more.
- Phone Number: This will generate a “click to call” phone number on Property Listing pages and in property phone shortcodes.
- Property Description: A paragraph of text telling shoppers about the property.
- Location: Street address, City, State Abbreviation, and Zip Code are used to let shoppers know where your property is located and to populate City Pages. Longitude and Latitude are used to place the property on a map in search.
- Office Hours: Represents the time bounds your property is open, closed, by appointment, or any other text. Displayed on Property Listing pages and property phone shortcodes.
- Pricing: If you plan to add floor plans and units, you should leave most of these fields alone as the property pricing will be calculated from the entered inventory. Otherwise, you can enter and choose pricing for your property.
Make sure to view the Property Editor and Content Fields document for specifics on the other fields. The more info you add about your property, the better its online presence will be.
Wrap Up
Once you are satisfied with your property, make sure to Publish it so that visitors can find it.

To view your property, you should enable the Property Listing template in RentPress Settings. It will also be visible on pages where you add a Property Search shortcode or template.
You can now add floor plans to your manually-added property.