Search Knowledge Base by Keyword
Upgrade To RentPress 7
Upgrade Your Site
We’ve released a major upgrade: RentPress 7. In this new version, you’ll find over 100 new features, including new templates, a modern editing UI, data sync that is faster and more reliable, and so much more.
If you’re currently using an earlier version, you can continue to do so. Though we always encourage you to use the latest version, we never force you to upgrade! However, you should be aware that we have no further plans for updates to older versions. Upgrading takes just a few steps, and some websites can complete the process in under an hour.
To make sure you’re getting the most out of RentPress, you’ll want to complete a few steps.
Getting Started
- Take a backup, staging copy, or local copy, etc of your site.
- We use Flywheel, which allows for easy staging sites.
- You can also try Flywheel Local if you like as it can be a faster to work in a local environment.
- Keep the live site open and signed in in another window for reference. We will use it later.
- In your local site, we want to fully delete all RentPress content. For each post, select all and Delete. Then visit each post’s trash section and fully delete all posts created by RentPress:
- Neighborhoods
- Floor Plans
- Properties
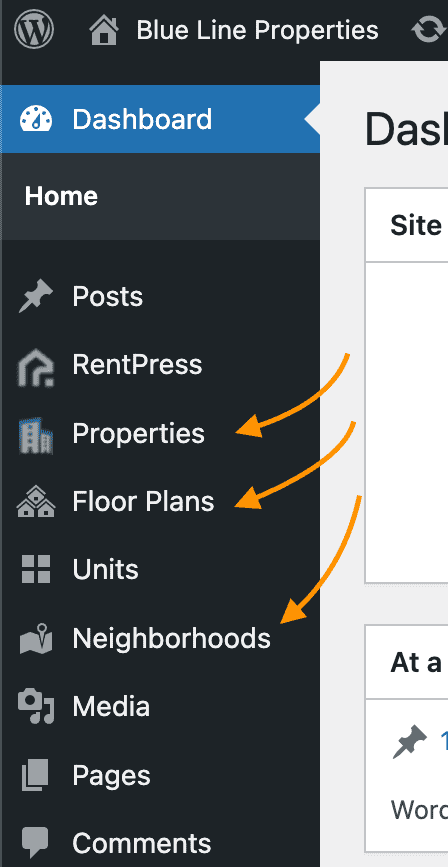
On your staging site, you’ll want to delete posts from Properties, Floor Plans, and Neighborhoods
- You could also leverage a plugin like WP Bulk Delete to help speed up the process.
WP Bulk Delete plugin is not a 30 Lines product. 30 Lines makes no representation or warranty, express or implied. - For more details, check out this tutorial from WP Beginner.
- Visit the Plugins page. Remove RentPress by first Deactivating, then Deleting.
- Optionally, clean up remaining WordPress data. You can try a tool like the WP-Sweep plugin.
WP-Sweep plugin is not a 30 Lines product. 30 Lines makes no representation or warranty, express or implied. Your use of the WP-Sweep plugin is solely at your own risk.- Install WP-Sweep plugin.
- Run the clean steps on the default settings.
- After the cleaning process, delete this plugin
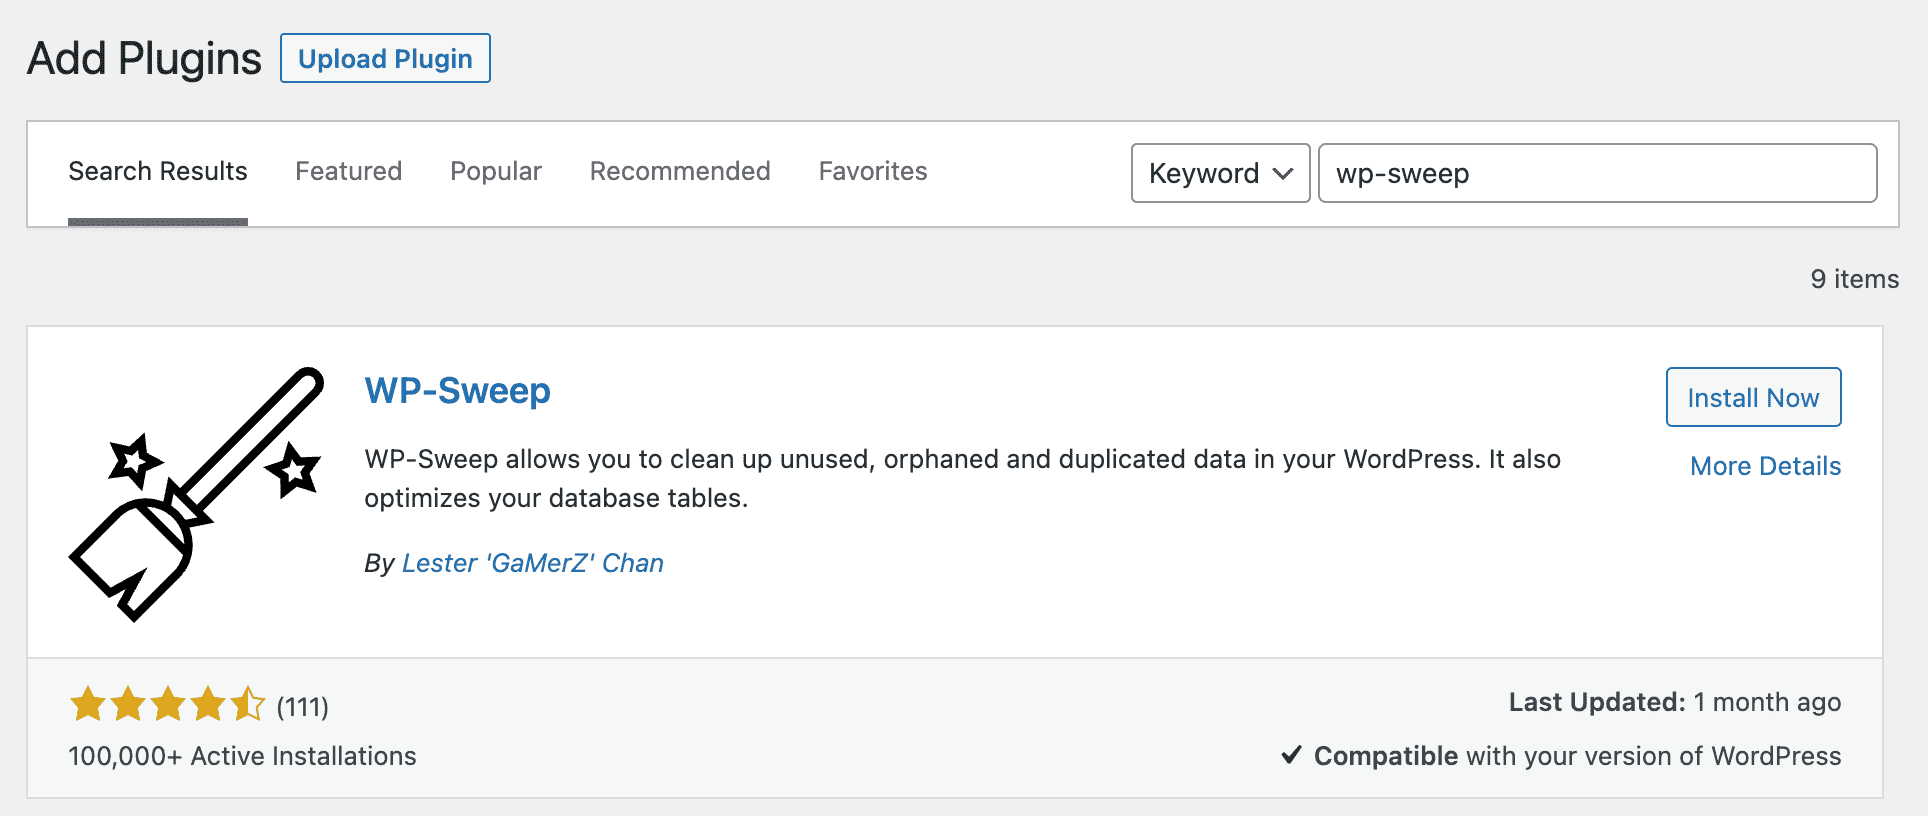
Searching for the WP Sweep plugin.
Add RentPress
- Install RentPress 7 plugin.
- From the admin, visit Plugins > Add New, and search for RentPress. Then click Install and Activate.
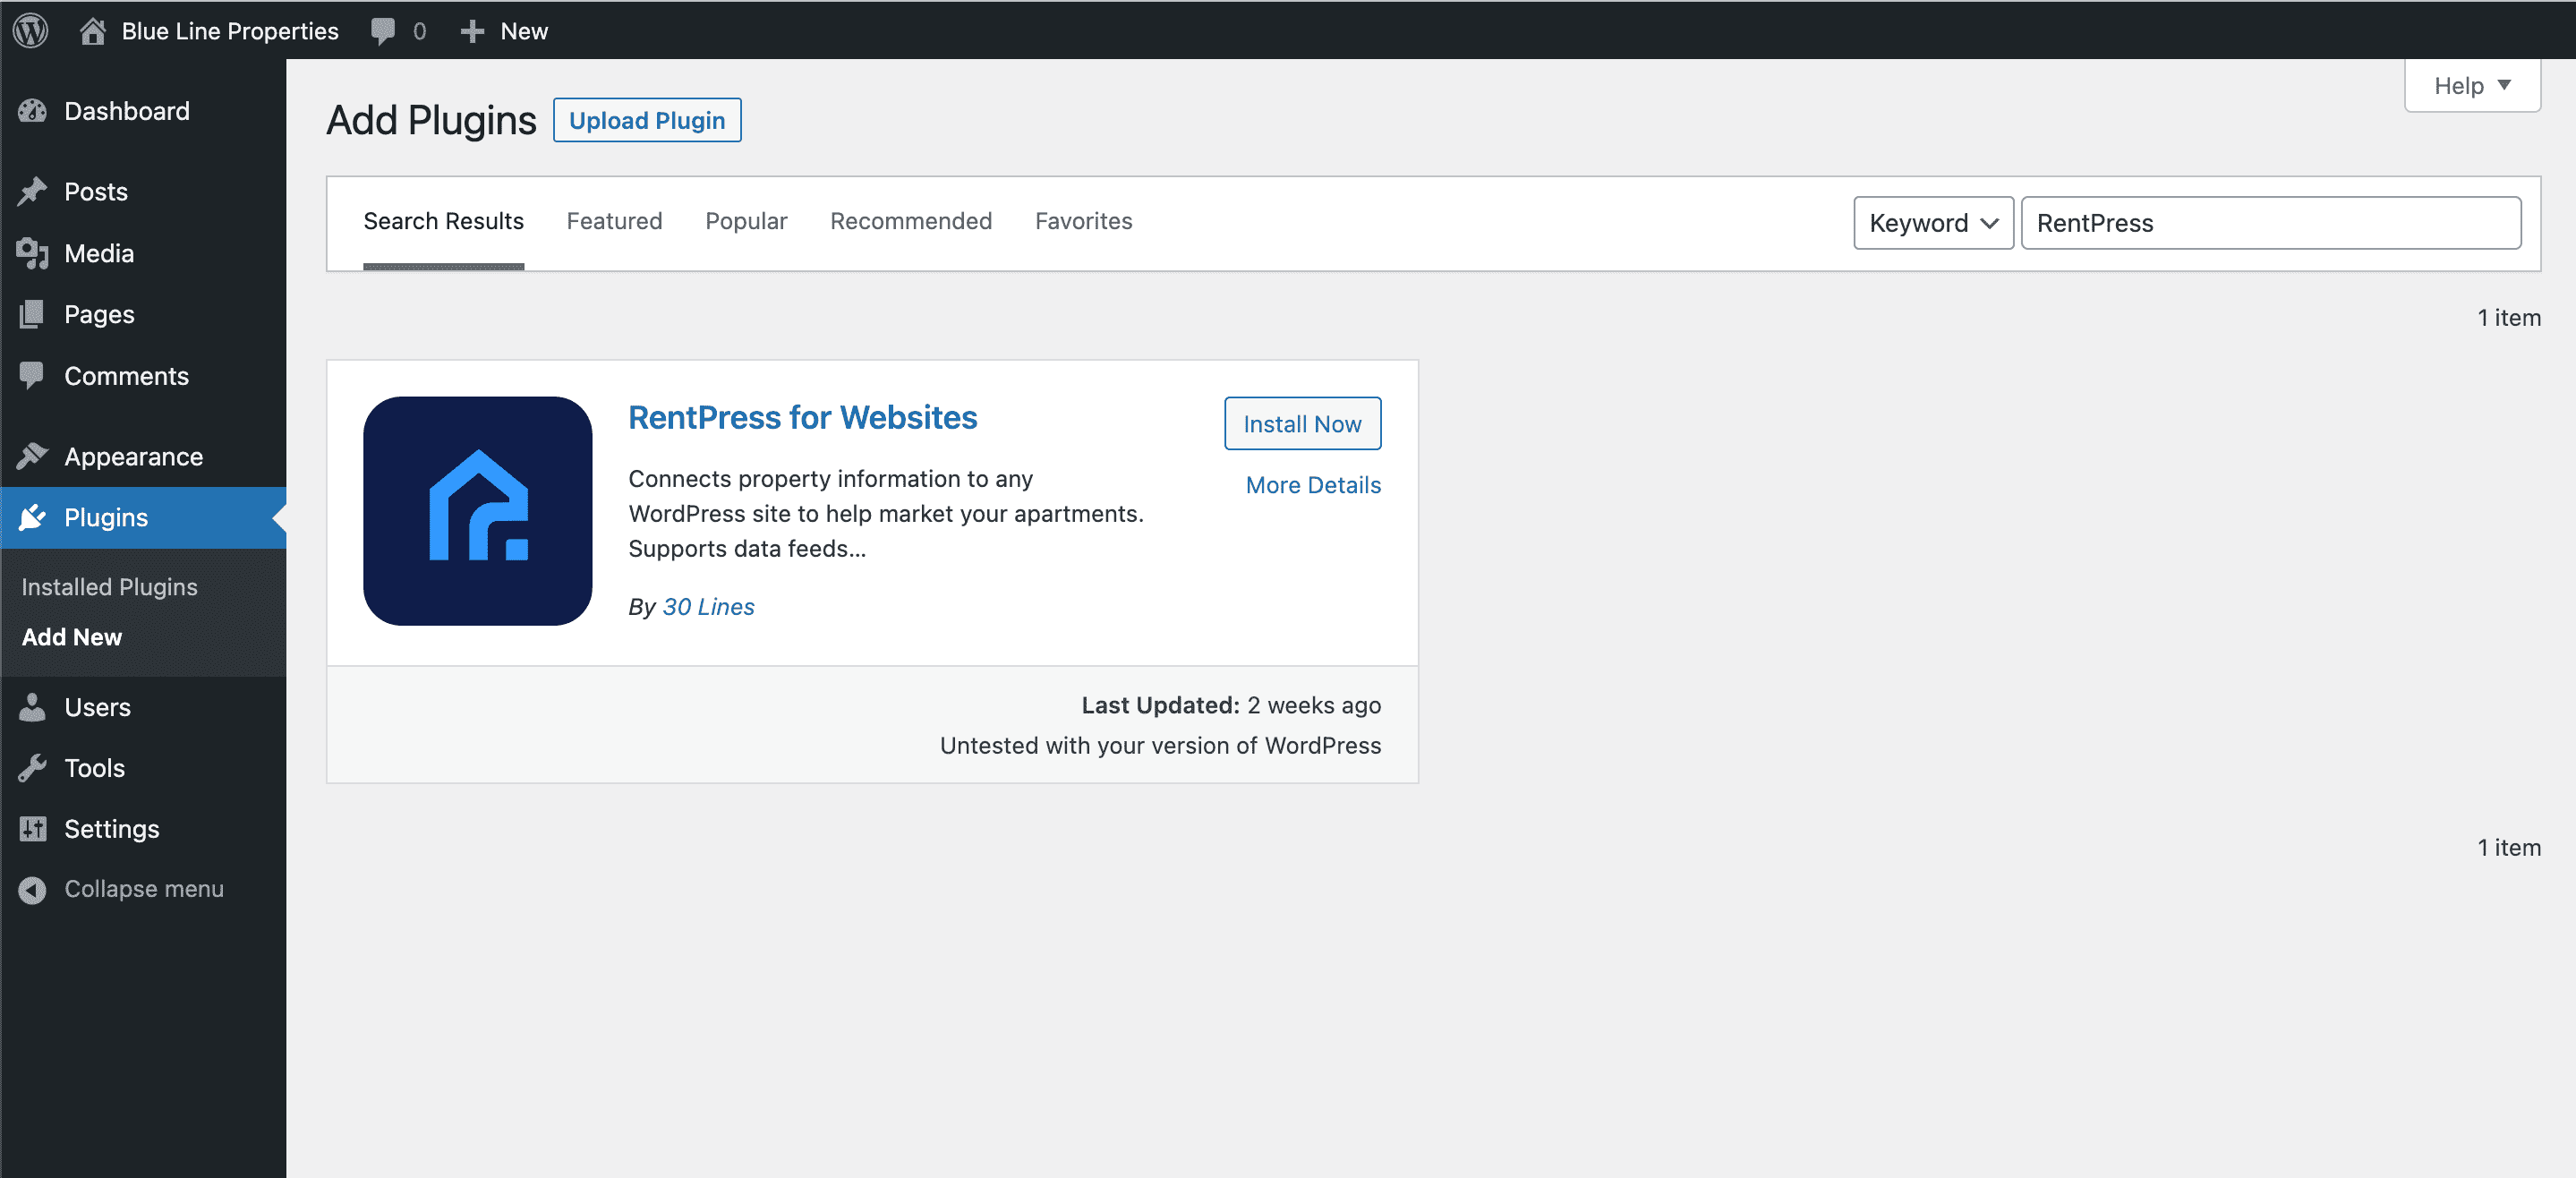
- Alternatively download from https://wordpress.org/plugins/rentpress-for-websites
- See also: How To Install RentPress
- From the admin, visit Plugins > Add New, and search for RentPress. Then click Install and Activate.
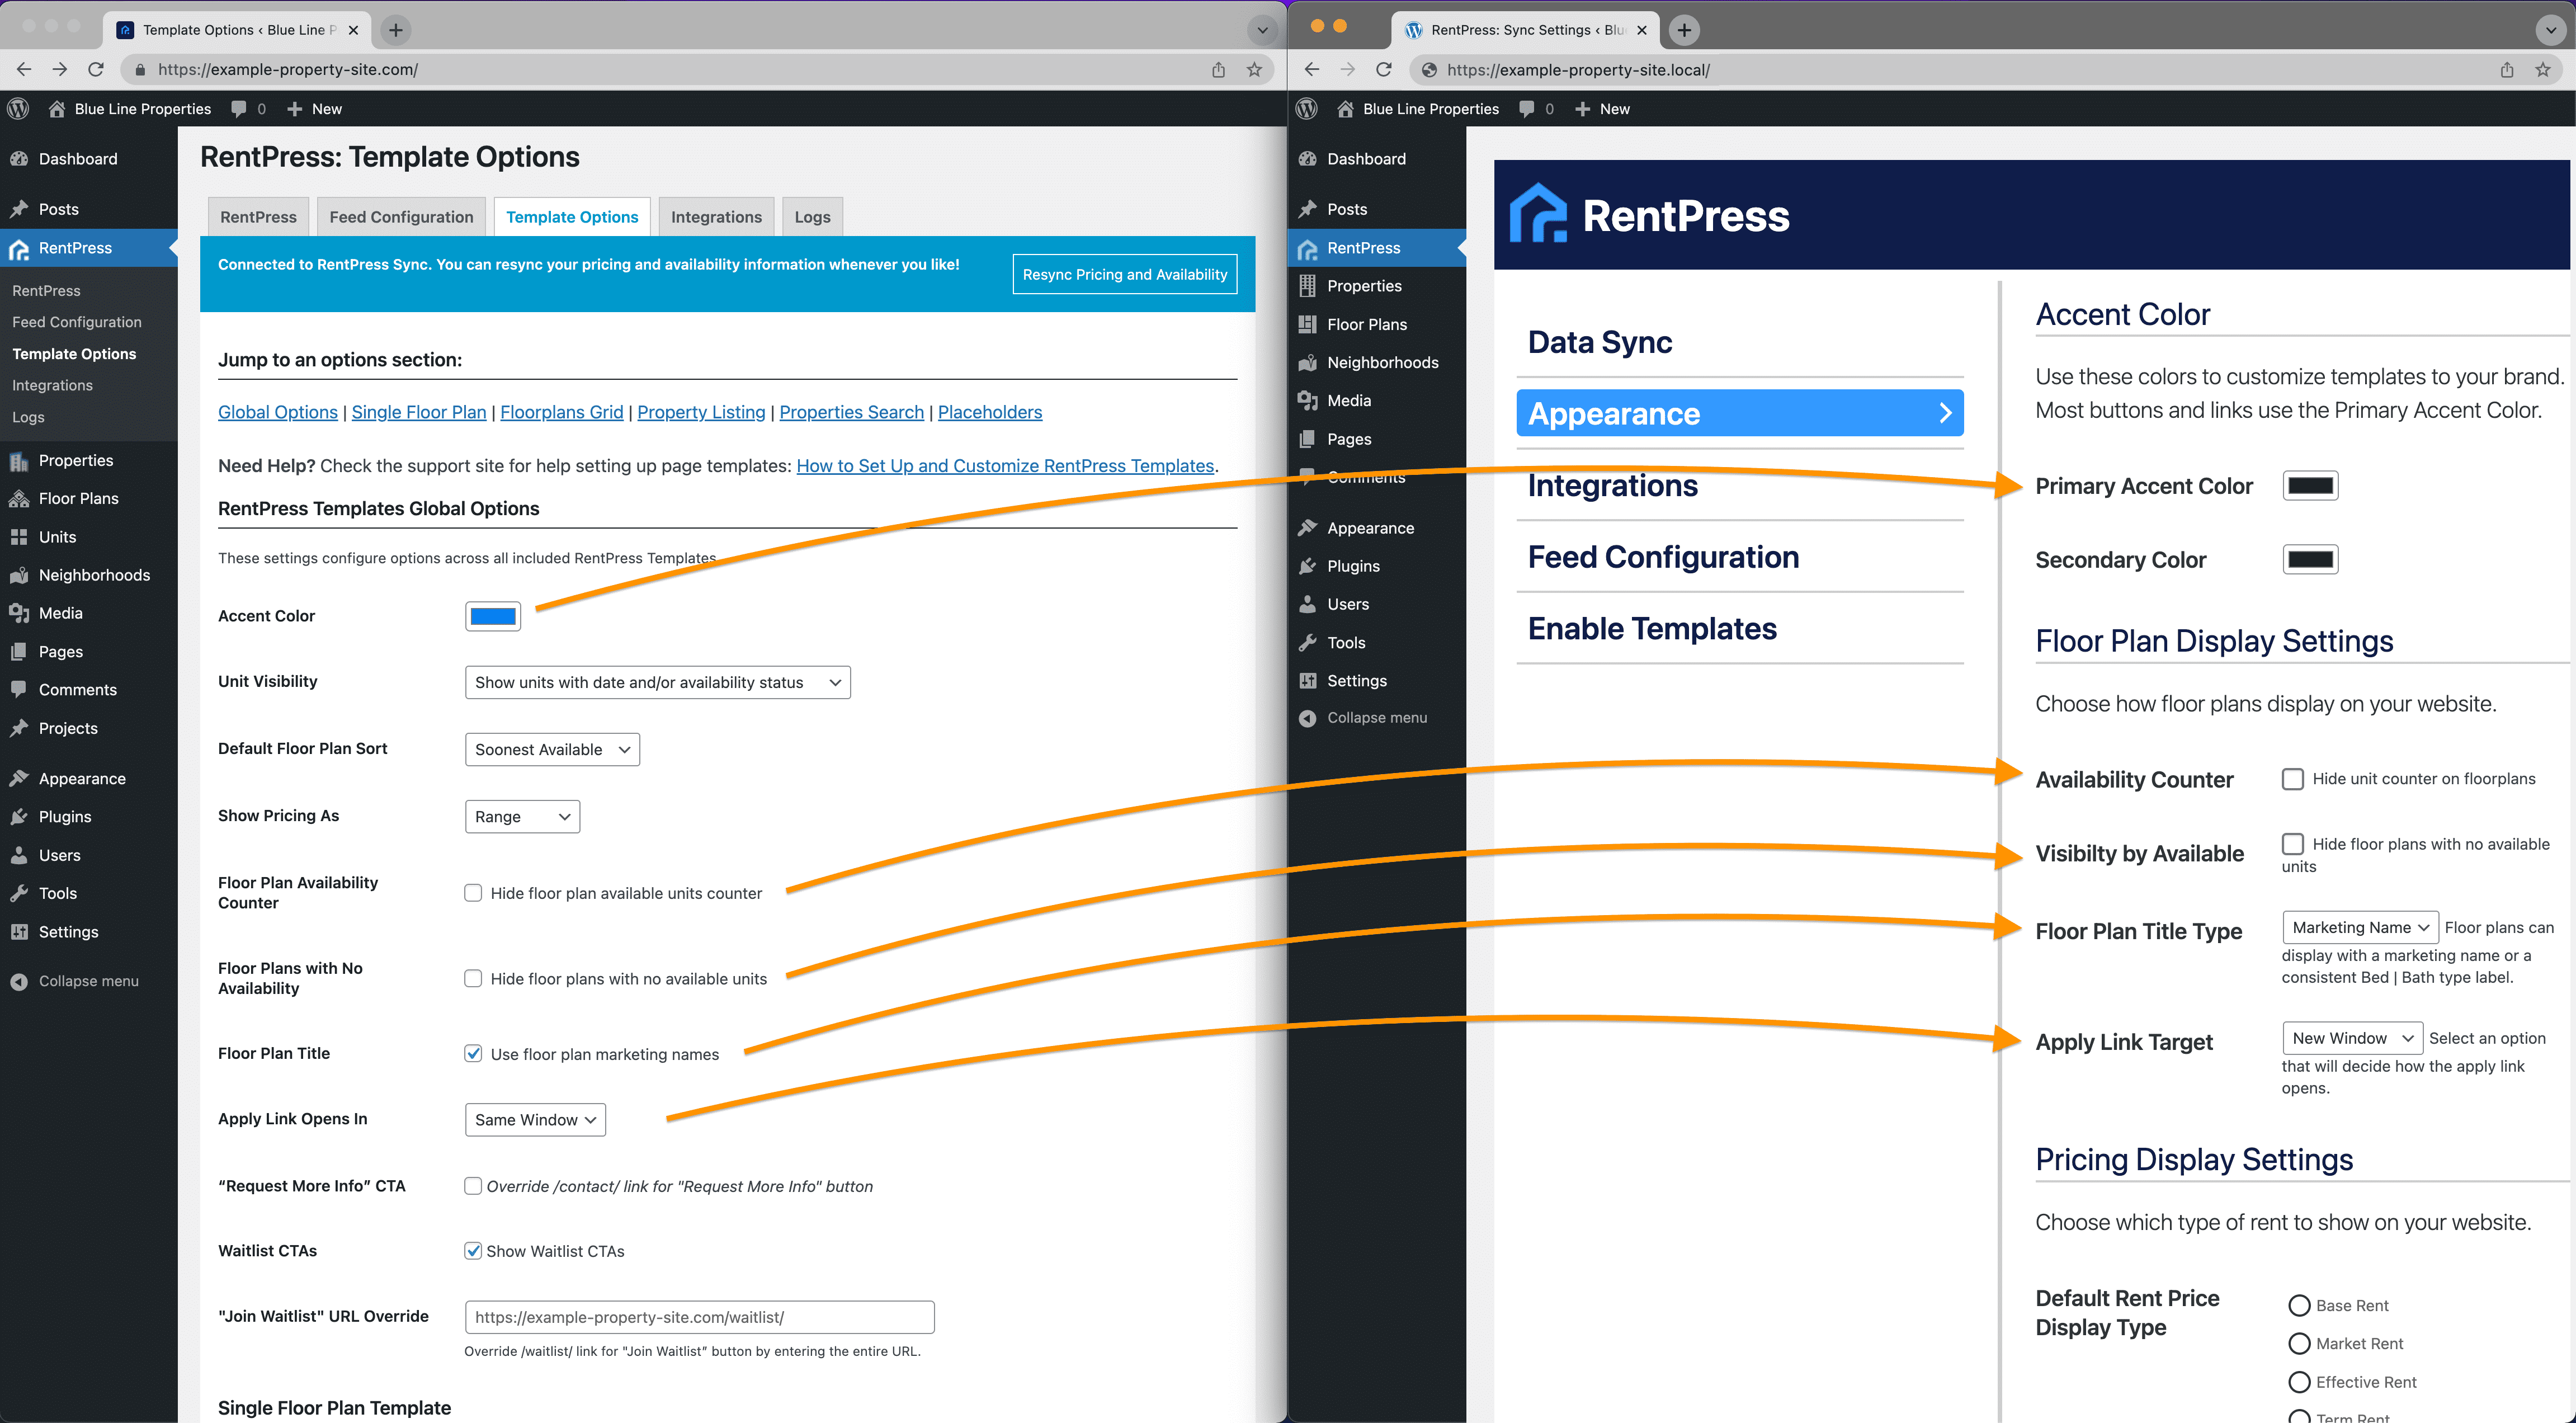
- Confirm RentPress settings are replicated on the staging site
- Visit the RentPress settings on both sites. Most settings from the old plugin will have a comparable setting in the new plugin. Some settings like pricing can now also be managed on a per-property basis.
- See also: RentPress Settings
Migrate your settings to new RentPress
- Add desired templates to your theme. Learn more at Templates Explained »
You can also choose to use shortcodes instead. While your site’s needs may vary, we recommend:- Floor plan single
- Amenity
- City
- Pets
- City Archive
- Property Listing
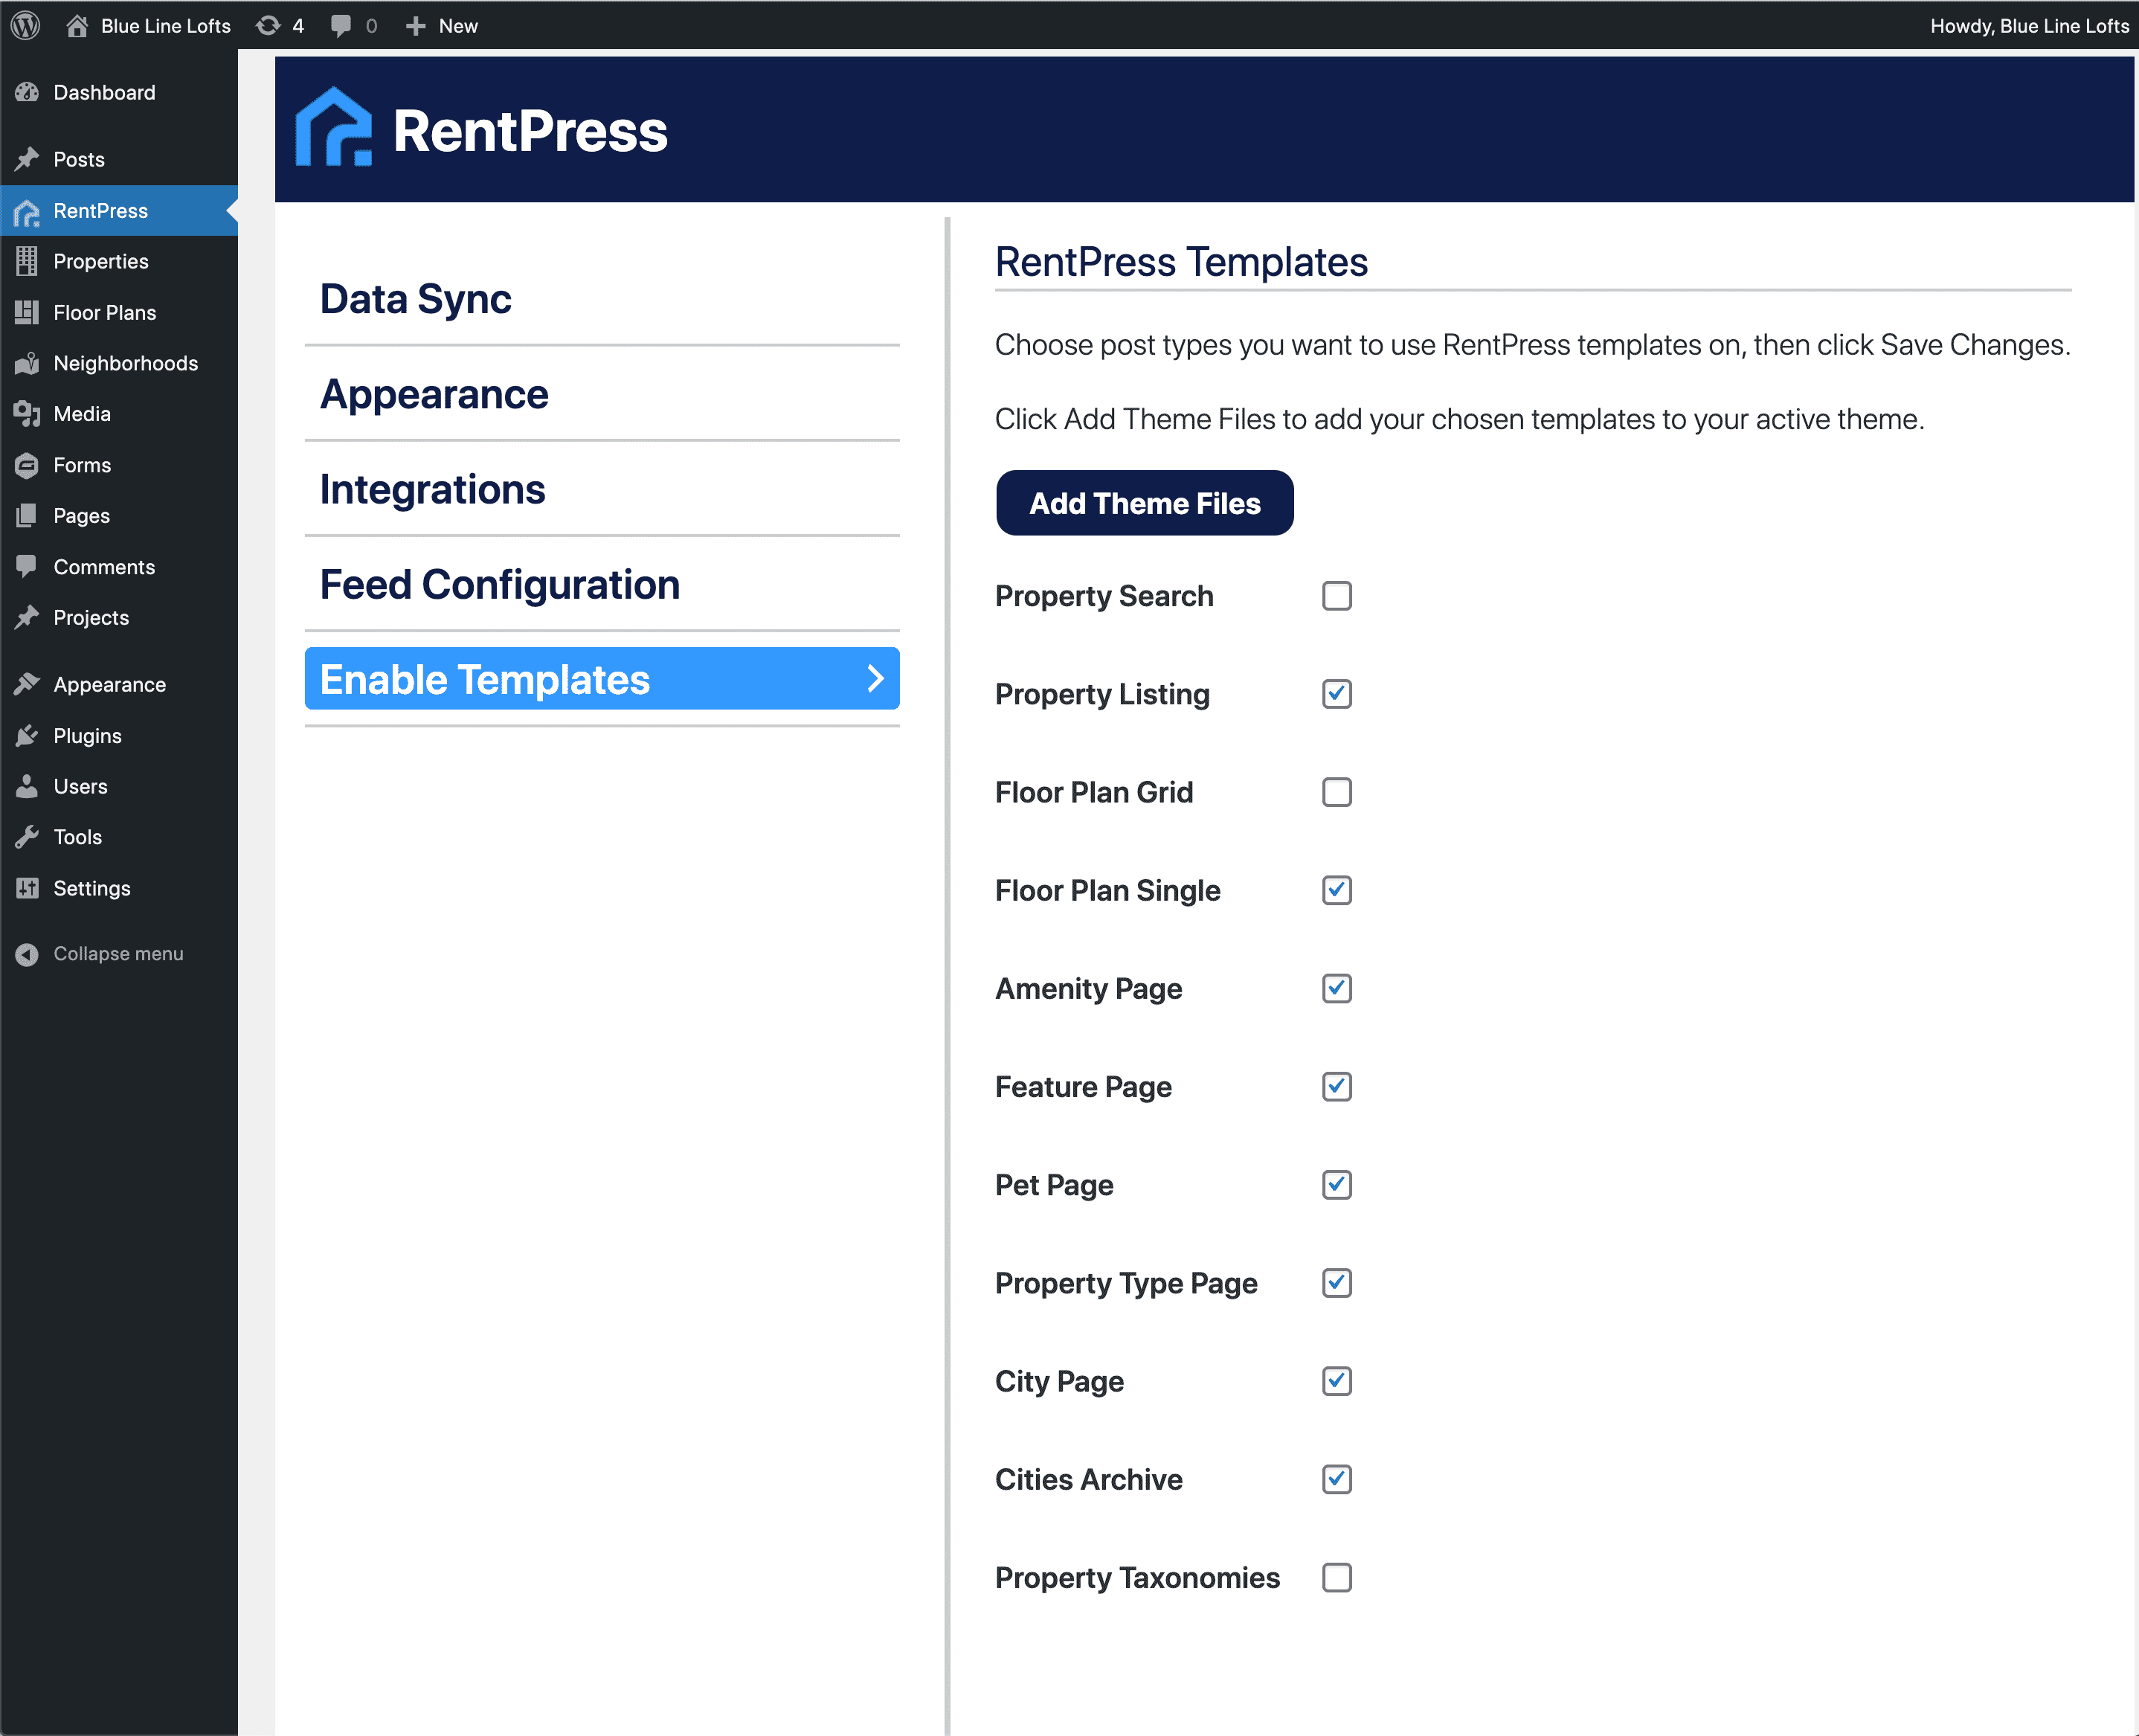
We recommend using these RentPress templates.
- Add License Key and sync data.
- If you’ve completed one sync, visit your property posts and ensure that they are all published. Then complete another sync.
- See also: Connect RentPress License Key and Username
- Add desired shortcodes to your site or theme. Depending on your site, we recommend:
- [rentpress_property_search]
- [rentpress_floorplan_search]
- See also: RentPress Shortcodes
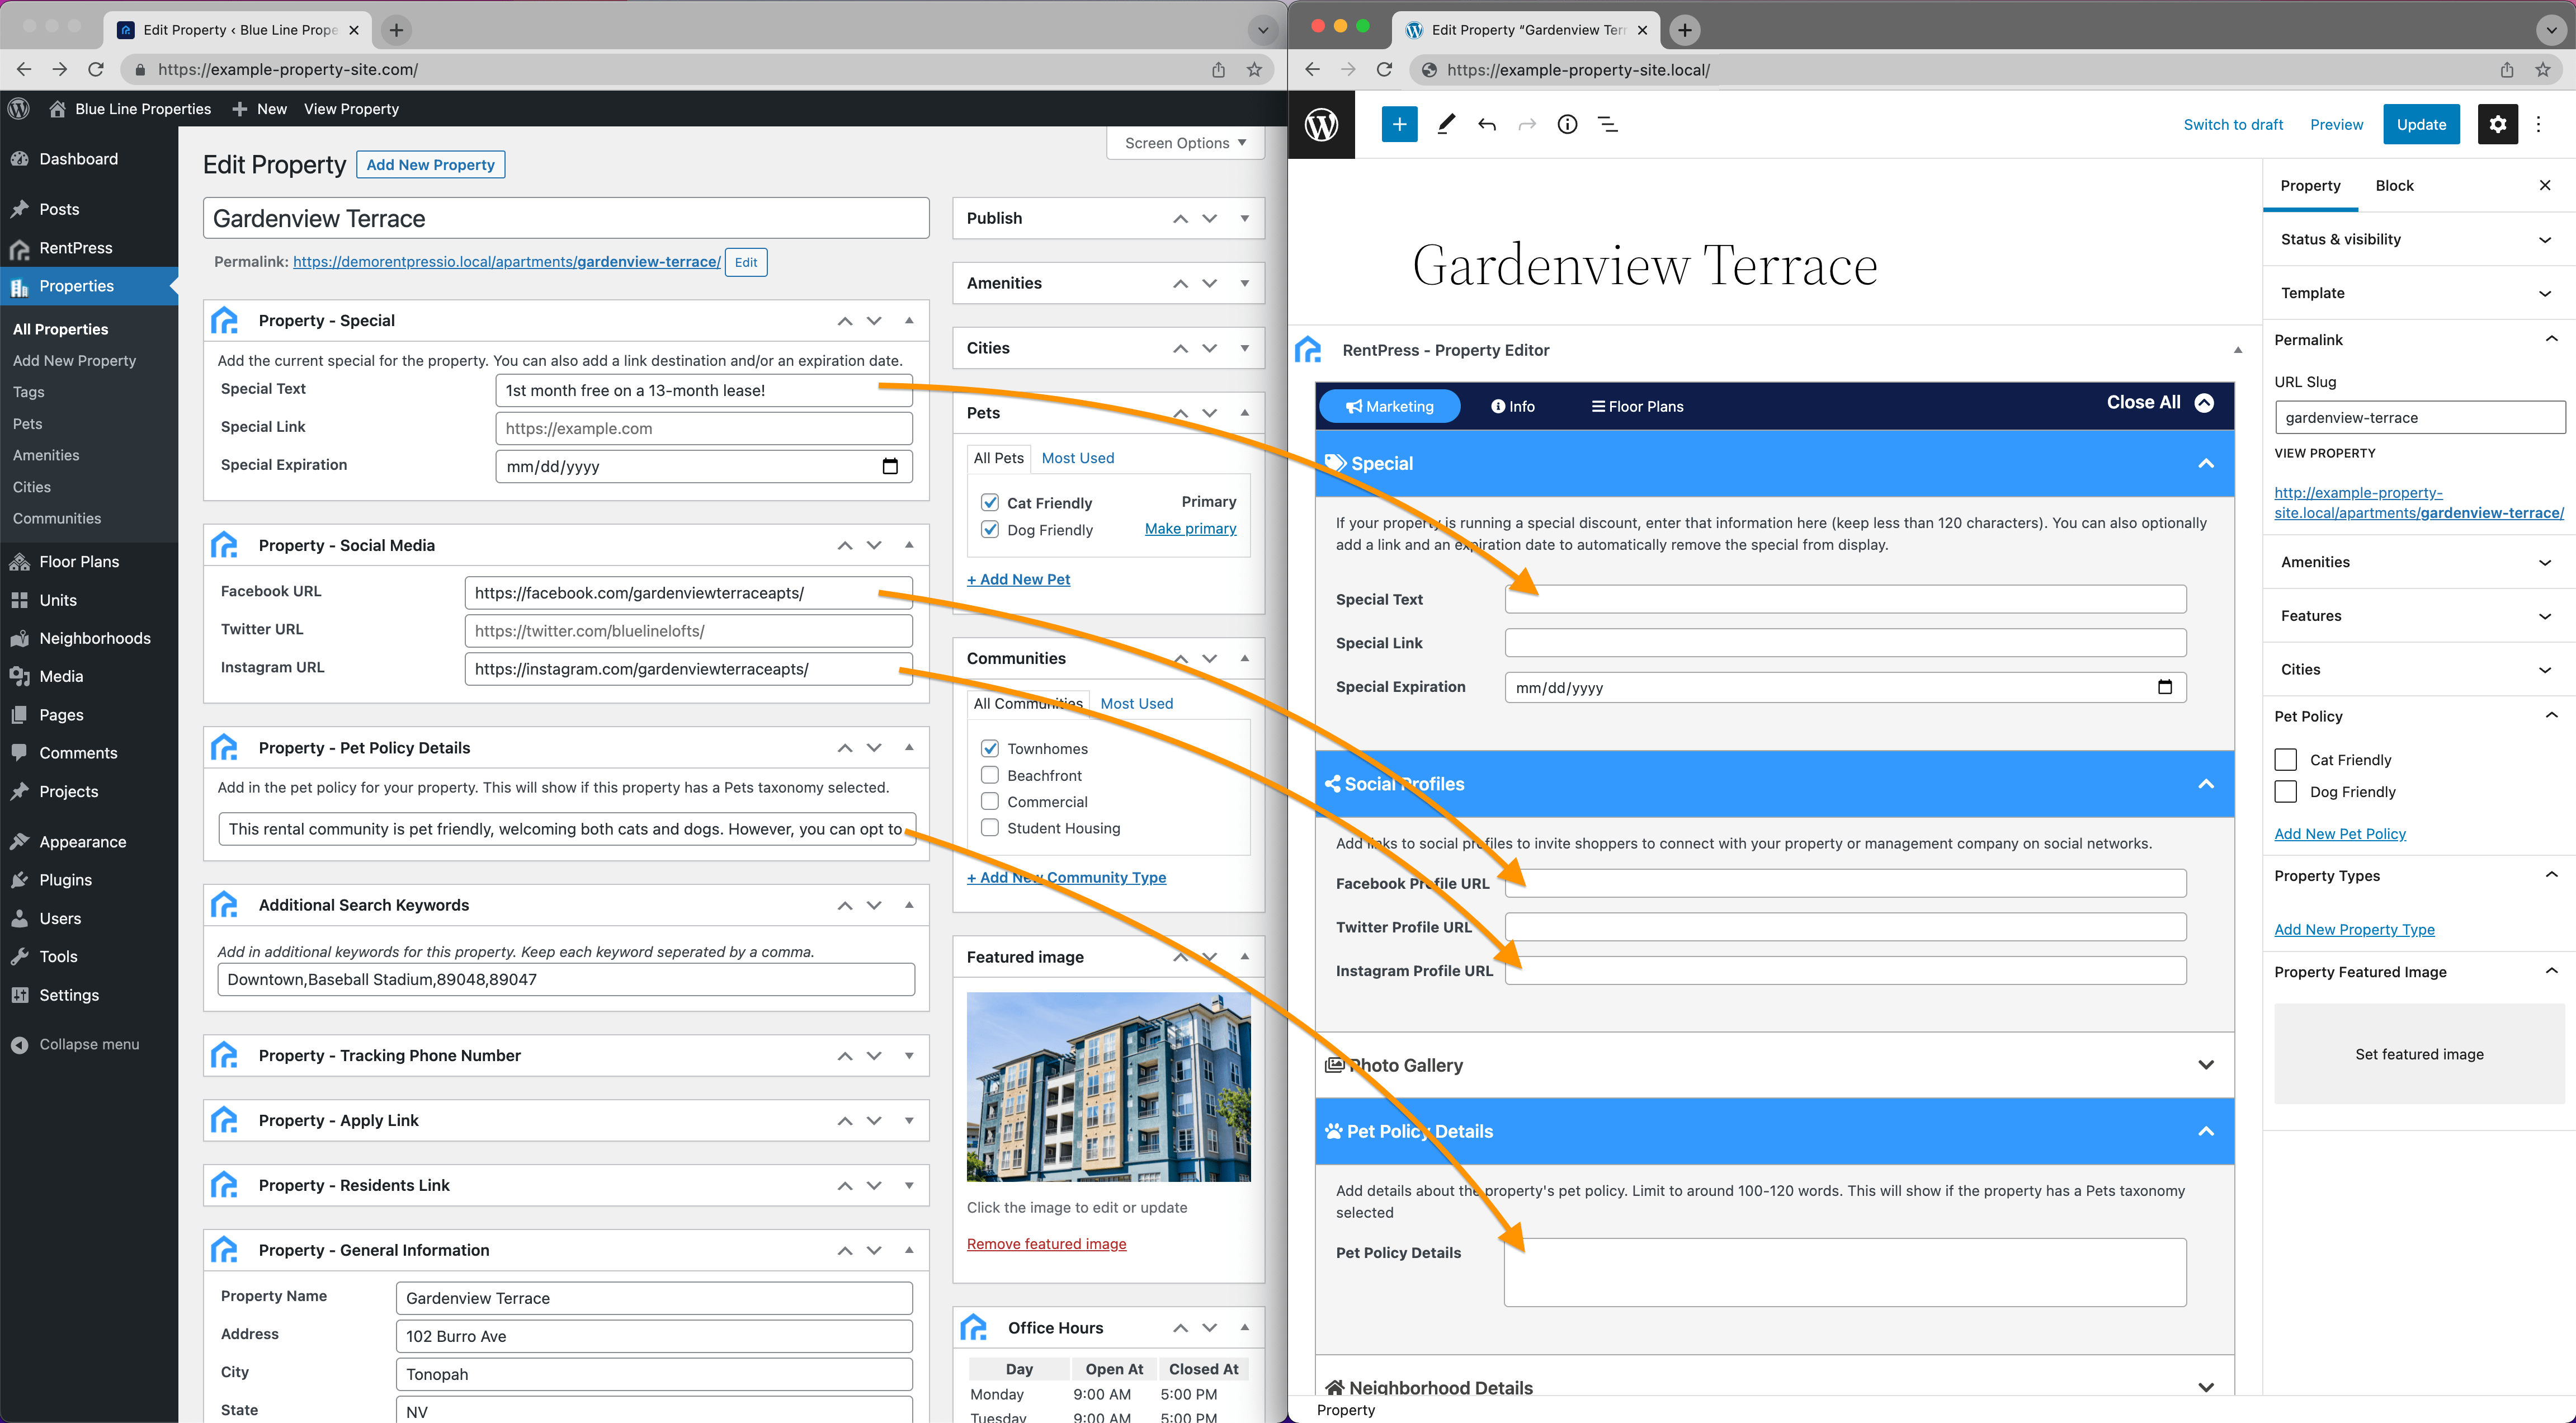
- Update content on new posts (properties and floor plans). Verify that the synced information matches and add previously-entered content to your new property post.
- Property:
- Property Name (post title)
- URL slug (should exactly match the previous URLs, or you can set up redirects)
- Special, link, expiration
- Social profile links
- Pet policy details
- Additional Search Keywords
- Phone number
- Application link and settings
- Residents link
- Pet taxonomy terms
- Property Types
- Featured Image
- You can set overrides for any value imported from the data feed like Office Hours, Pricing, etc., should you wish.
- You do not need to manage Amenities or Cities for a synced property.
- Any non-RentPress content
- ex: Other plugins such as Yoast allow you to enter content into the post.
- See also: Property Content Fields
Upgrading RentPress property content
- Floor Plans
- Floor Plan name (post title)
- URL slug (should exactly match the previous URLs)
- Special, link, expiration
- Matterport/tour
- Images
- Floor plan description
- Floor plan features
- Pet policy
- Featured Image
- You can set overrides for any value imported from the data feed like Square Footage, Pricing, etc., should you wish.
- Any non-RentPress content
- ex: Other plugins such as Yoast allow you to enter content into the post.
- See also: Floor Plan Content Fields
- Neighborhoods
- Create Neighborhoods
- Assign properties into your neighborhood
- Add content like image and description.
- See also: Neighborhood Content Fields
- Property:
- Update website content where needed.
- Content pages, forms, etc. Anything that depended on the old properties or floor plans. Keep in mind that your properties and floor plans will have different post IDs now.
- Contact forms with conditional logic
- RentPress Shortcodes like address, hours, etc
- Test/confirm CTAs throughout your site link to proper destination.
- Test/confirm that all data is passed through to contact forms properly
Ready for Launch!
- Once you’ve ready to launch, take a backup of the live site, then push your site to production.
- Do a final review and confirm things look correct.
- Take a look at 30 Lines’ Website Post Launch Checklist » for more.