Search Knowledge Base by Keyword
How To Install RentPress
Overview
Installing RentPress is quite simple and is the same process as installing many other plugins. In this article, we will show you how to quickly install RentPress using the plugin uploader inside your WordPress admin dashboard.
If your site is hosted by WordPress.com you can only install RentPress if you are on their Business plan, with a custom domain configured, and have installed the Hello Dolly plugin. You can then install RentPress from the /wp-admin/ dashboard using the instructions below.
Demo Video
Using the WordPress Dashboard (Recommended)
- First, log in to your WordPress dashboard.
- From within your WordPress admin dashboard, hover over Plugins on the left side navigation menu and click on Add New. Within this page, search for RentPress in the plugin directory.
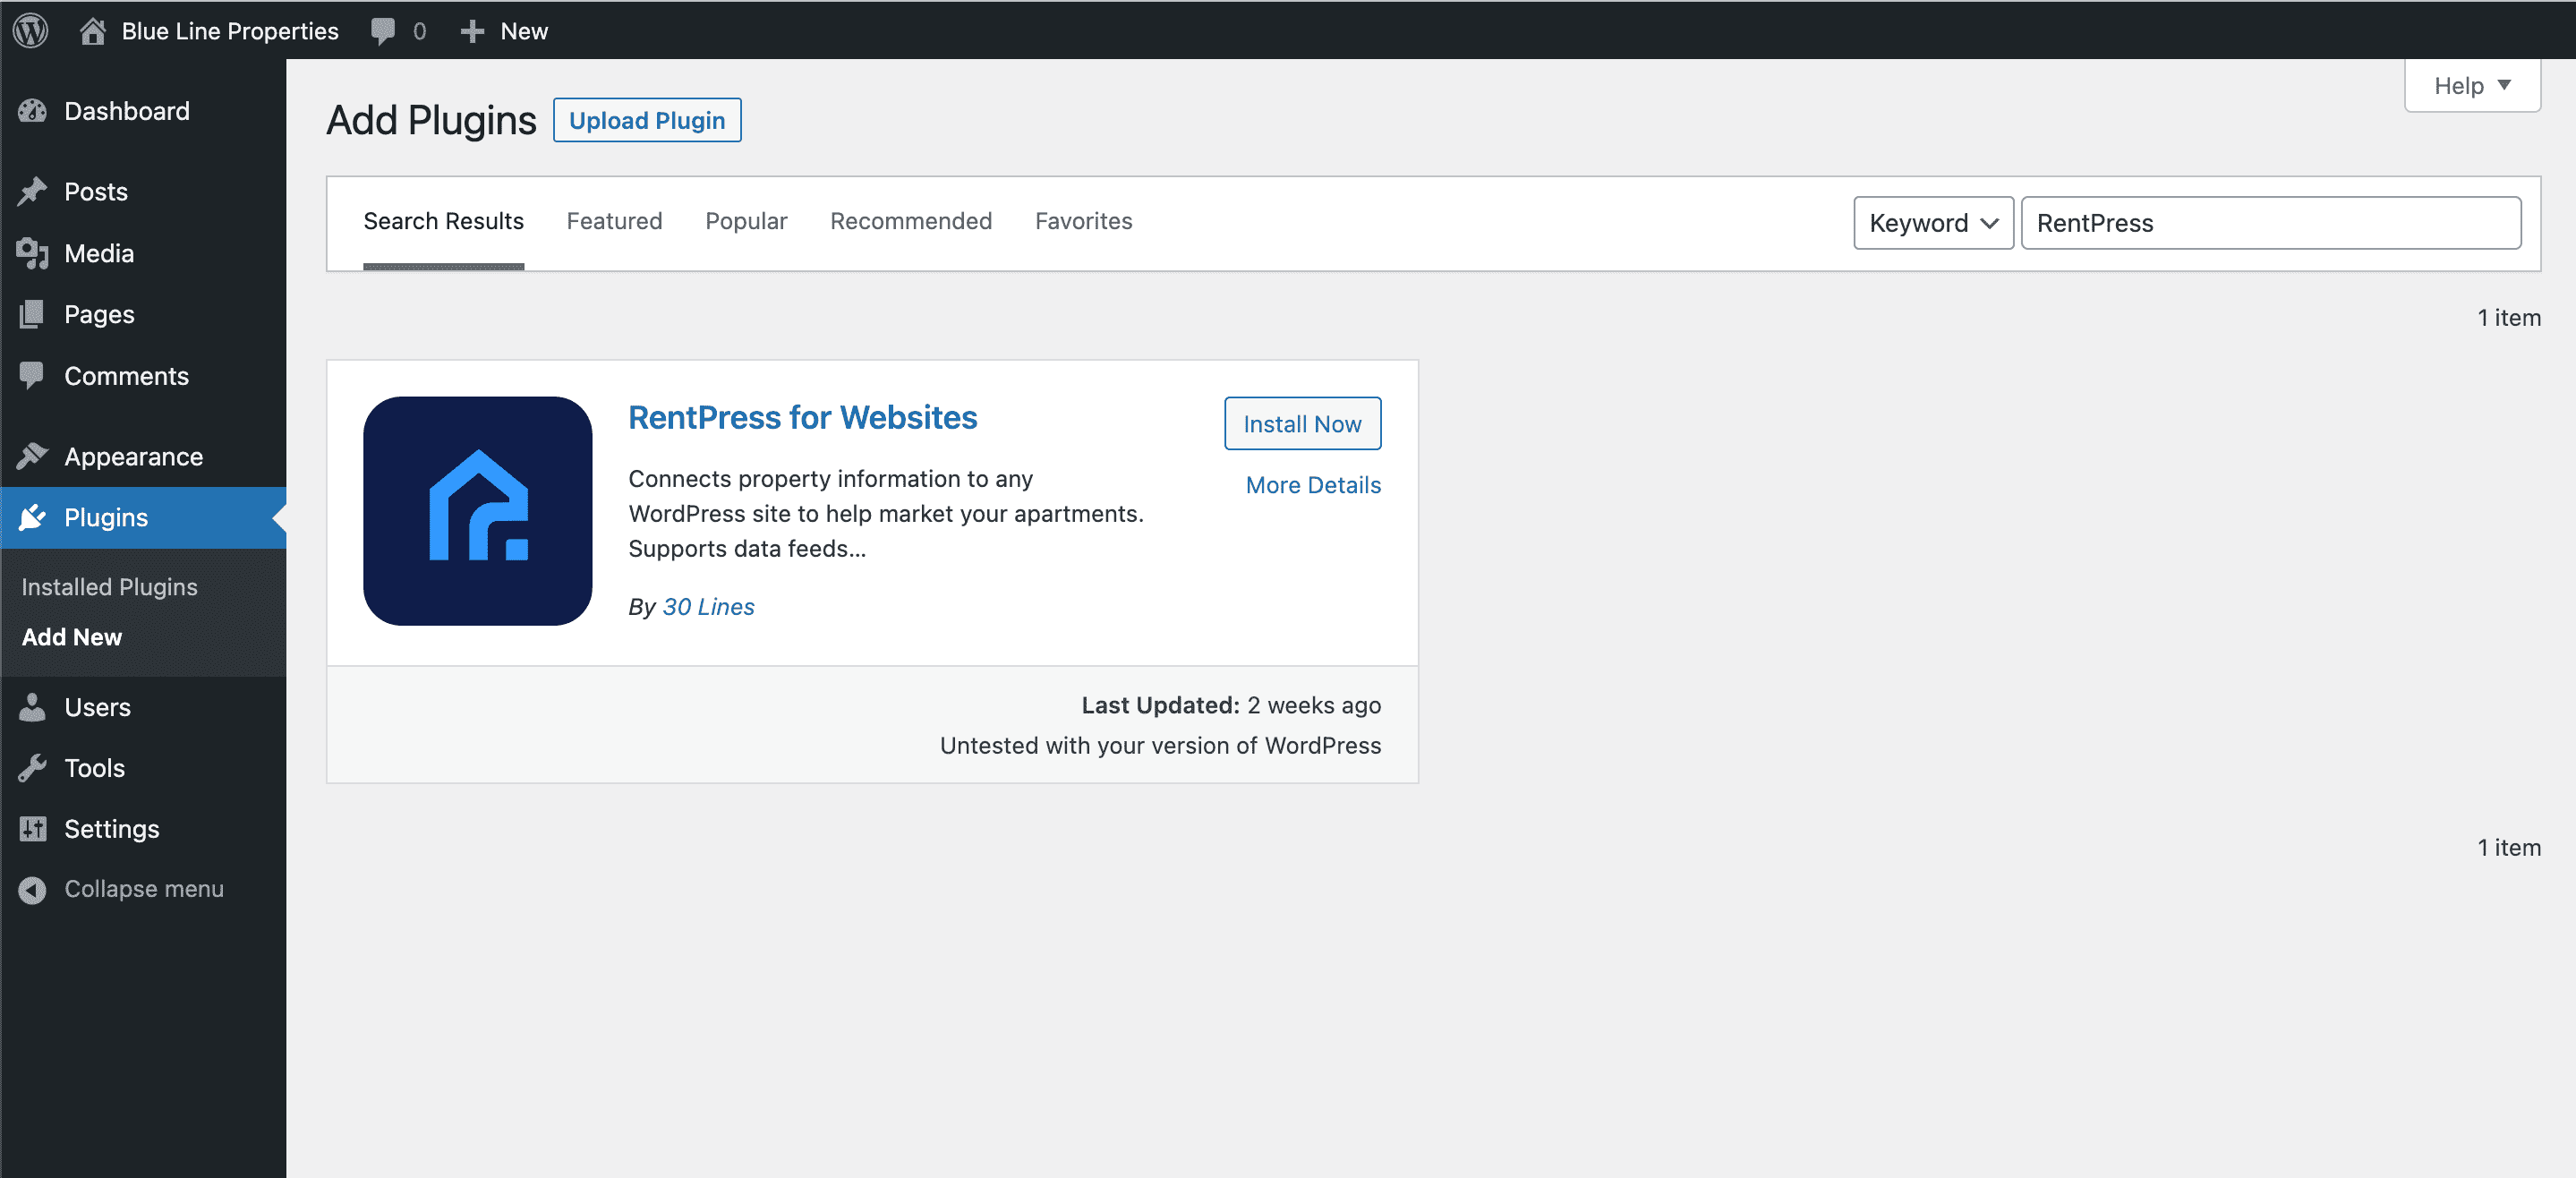
- Click Install to start the installation process.
- WordPress will now automatically handle the installation of RentPress. Once complete, be sure to click Activate Plugin to activate RentPress.
Using FTP
- First, download RentPress. To do so, visit the RentPress plugin page ↗ in the WordPress directory and download the plugin zip file.
- As you are installing via FTP, you will need to unpack the zip file that you downloaded.
- Next, access your WordPress site via FTP and navigate to the wp_content/plugins directory. Inside there, upload the entire ‘rentpress-for-websites’ folder that you have obtained as result of unzipping the zip file.
- Once fully uploaded, access your WordPress admin dashboard and click on Plugins. Inside this page, you should now see an entry for RentPress. All you have to do now is activate it by clicking one Activate Plugin.
That’s it! RentPress is now installed and running on your WordPress site. To get started, you may now follow our guide on setting up RentPress.