Search Knowledge Base by Keyword
Switch to A New Property Management Software Data Feed
Make Your Move
If you have used RentPress to power your website and are now looking at changing data providers, you can do this easily without disrupting the rest of your website.
First you’ll want to consider if you have added much content to your properties and floor plans. Then consider internal and external content from pages and systems that depend on or reference your properties and floor plans. Finally, consider differences in how the properties and floor plans are represented differently between the two systems.
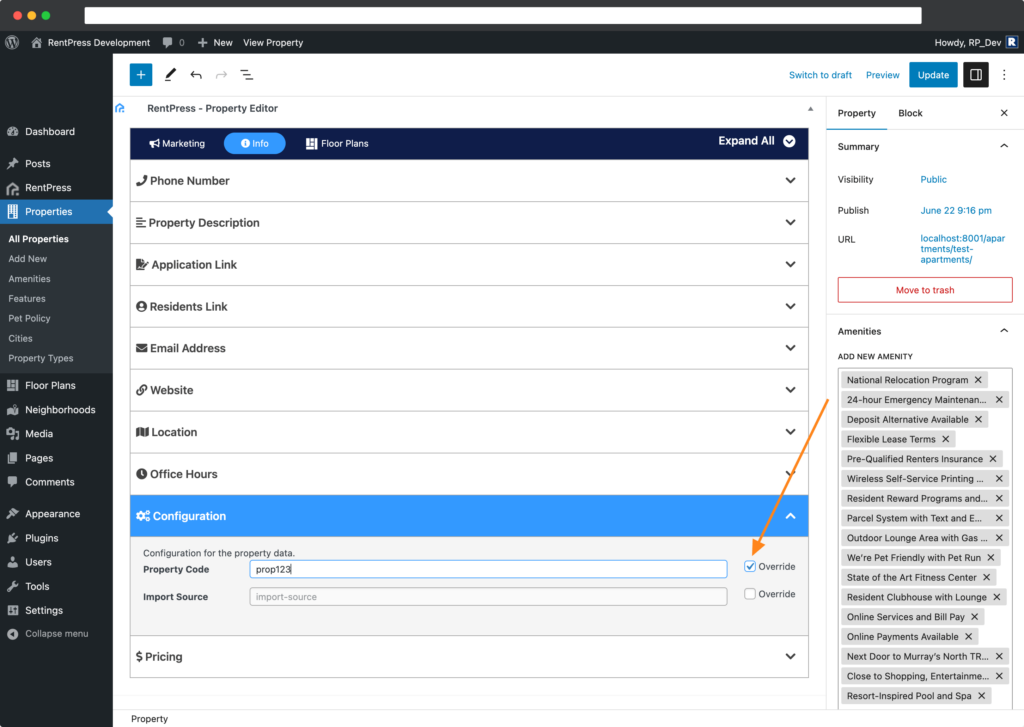
For RentPress, the main concern is the property code. You’ll find this within the Property Editor > Configuration section. The property code is what RentPress uses to keep track of your property and its information. You’ll find the property code used in many places including within shortcodes.
You’ll also see similar structure within each Floor Plan Editor > Configuration section. Each floor plan has a unique Floor Plan Code and, crucially, the Parent Property Code, which is how RentPress handles the structure behind the scenes.
When switching to a new system, you’re guaranteed to have new property codes and floor plan codes. Gather your new property can floor plan codes to get started.
Swap In Place
- Take a backup, staging copy, or local copy, etc of your site.
- We use Flywheel, which allows for easy staging sites.
- You can also try Flywheel Local if you can as it can be a bit faster.
- In your work site, visit the Properties post list and Edit the property in question.
- In the Property Editor > Info > Configuration, enable the Override on the Property Code field, and paste in your new property code.
- Check through the rest of the post editor as well. Any other enable Overrides will retain their currently-entered values. Any data that does not have an active Override could be replaced with data from your new property.
- Note that your new feed provider may not have an equivalent data point for everything your previous software provided, and vice versa.
- In general, data on the Info tab should be subject to your data feed while data on the Marking tab should be manually added. You experience may very depending on your property management softwares.
- Click Update in the upper-right corner to save your changes.
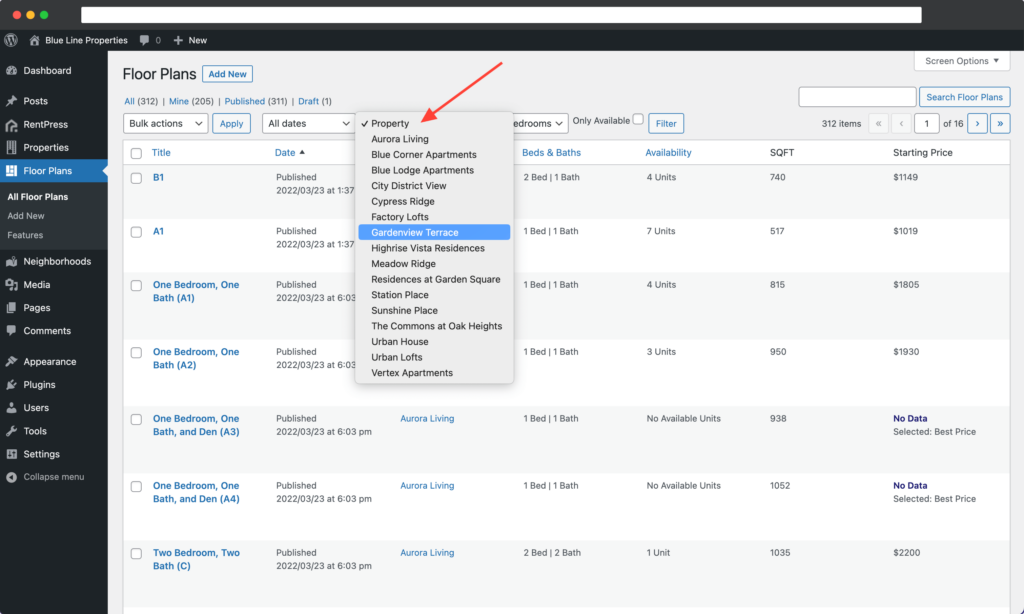
- Next, visit the Floor Plans post list and filter to the property in question.
- If you have added content to your floor plans (I.E.: Featured Image, Virtual Tour, etc.), you might choose to follow a similar method as with the property. Or you can follow a simpler but potentially more-involved method.
- To keep your floor plan posts in place:
- Edit each floor plan
- Navigate to Floor Plan Editor > Info > Floor Plan Info
- Ensure the Parent Property Code reflects your new property code
- Override the Floor Plan Code and enter your new floor plan code
- Update your post to Save Changes.
- With your new key in place, RentPress will automatically update your floor plans with pricing and availability
- You can instead have RentPress take care of it:
- From the Floor Plans post list, select and Delete all of your floor plans for your property
- Navigate to the floor plan trash, and permanently delete them off of your site
- With your new key in place, RentPress will automatically create new floor plans as described by your new property management software.
- If you had content entered on your previous floor plans, you’ll want to replicate that on your new floor plans. You may find it helpful to reference your backup copy for this process.
- To keep your floor plan posts in place:
- Once you have your overrides in place, visit RentPress Settings > Data Sync and replace the existing License Key with your new one, then click Save Changes. You can now request new data by clicking Sync Properties.
That’s all for the RentPress-specific parts of the process.
Next Steps
- Update website content where needed.
- Content pages, forms, etc. Anything that depended on the old properties or floor plans.
- Contact forms with conditional logic. Consider that your site has different property codes now.
- RentPress Shortcodes like address, hours, etc that depend on property codes.
- Test/confirm CTAs throughout your site link to their proper destination.
- Test/confirm that all data is passed through to contact forms properly
Ready for Launch!
- Once you’re ready to launch, take a backup of the live site, then push your site to production.
- Conduct a final review and confirm things look correct.