Search Knowledge Base by Keyword
RentPress: Gravity Forms Add-On
Requirements
You must have RentPress plugin (version 7.3 or later) installed and Gravity Forms plugin installed on your site before installing the RentPress: Gravity Forms Add-on plugin.
The latest version of RentPress can be downloaded here: https://wordpress.org/plugins/rentpress-for-websites/
The latest version of Gravity Forms can be downloaded here: https://www.gravityforms.com/
Installation
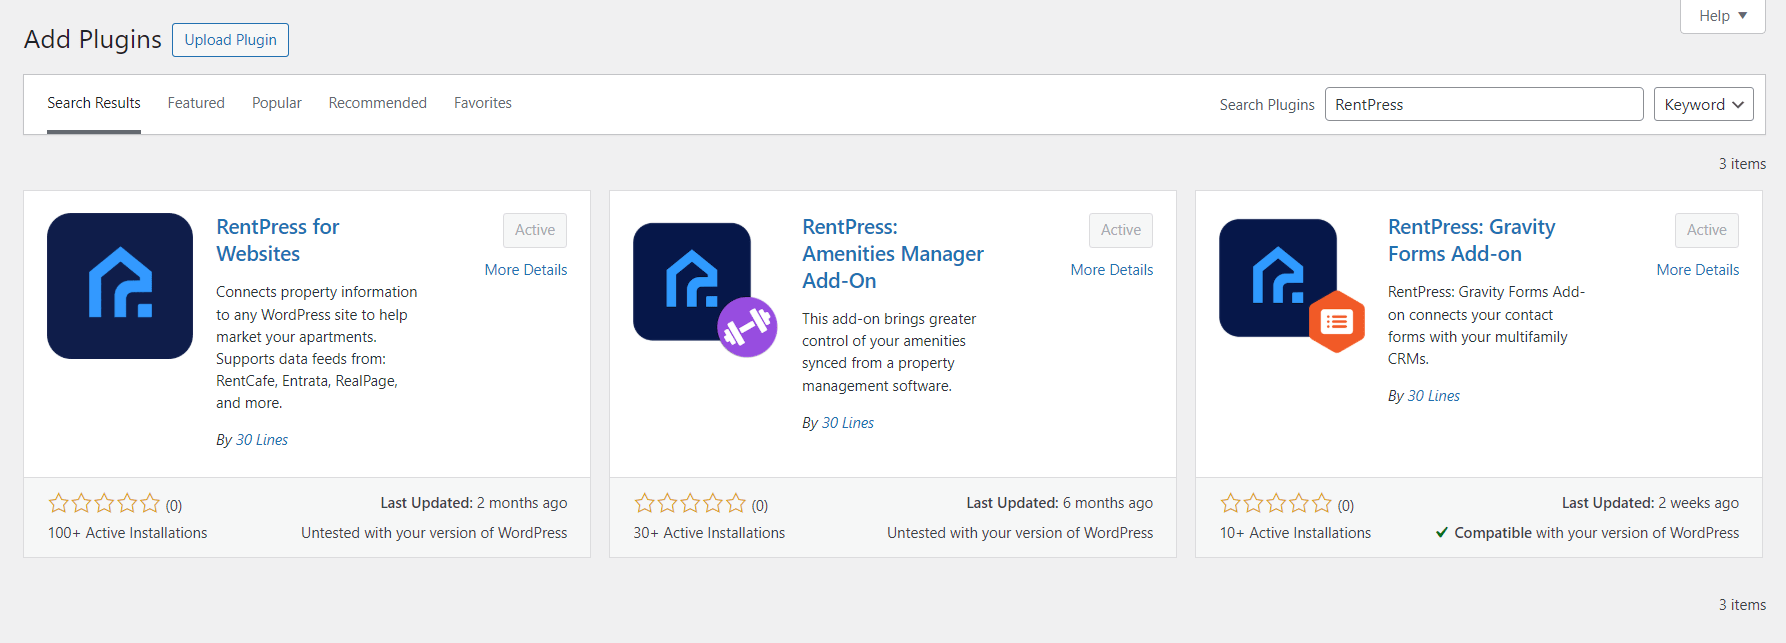
Go to the Plugins page of WordPress, click on Add New, then search for “RentPress” then Install and Activate the RentPress: Gravity Forms Add-on plugin.
Connect Lead Destination
Once installed, navigate to Gravity Forms’ “Settings” tab and click on the RentPress Forms tab.
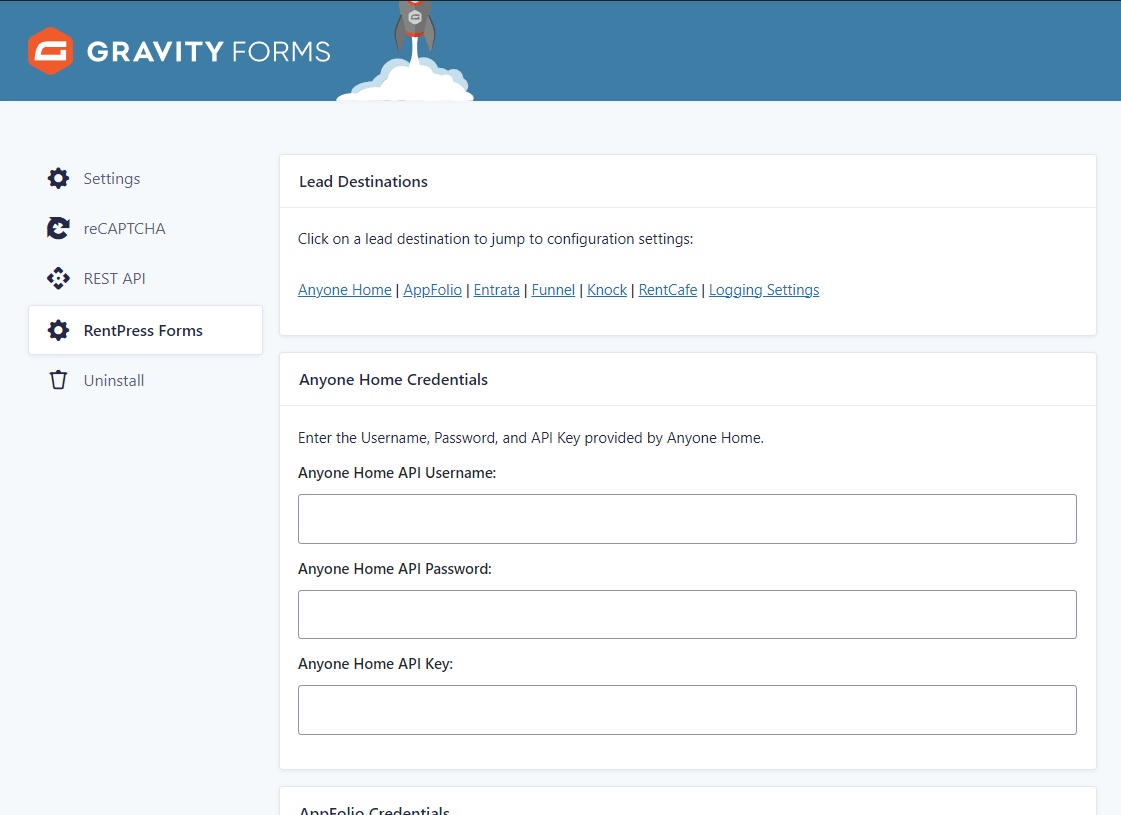
To use the rest of the plugin, you will need to add credentials to connect to your CRM. Each destination has different needs. Make sure each is entered exactly as described by each provider.
Supported Lead Destinations
The RentPress: Gravity Forms Add-on supports the following lead destinations:
Anyone Home
API Username, API Password, and API Key provided by Anyone Home.
AppFolio
Client ID, Client Secret and Partner ID provided by AppFolio.
Entrata
API Key and API Company Subdomain to submit to Entrata Lead Manager.
Typically the subdomain is the name of the property management company. To test to make sure you have the correct subdomain, try visiting this URL in your browser after swapping out the Xs: https://apis.entrata.com/ext/orgs/XXXXXXX/v1/documentation/
Funnel
API Key provided by Funnel.
Knock
API Username and API Password provided by Knock.
RentCafe
API Token, API Username (Provided by 30 Lines), API Password provided by RentCafe, Use RentCafe V2 API (Most likely to be checked)
At the bottom of the page, click Save Settings to save the credentials. Once you click Save, you can now set up your forms to deliver to these lead destinations. You can set up a feed to any new or existing forms.
Feed Settings
Navigate to the Forms tab of Gravity Forms. Click on the form that you would like to gather leads from.
Mouse over the Settings menu for that form, and click on the RentPress Forms tab.
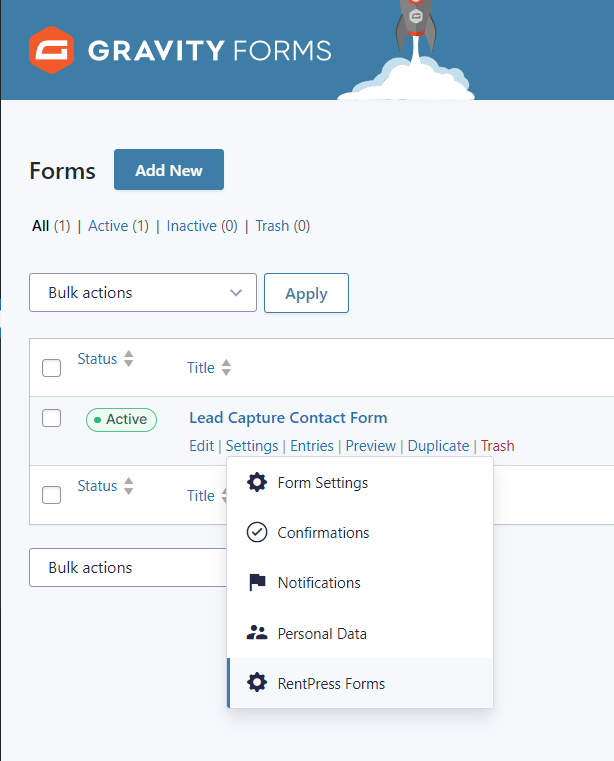
You will see a screen that says you don’t have any feeds configured. Click on “Create One” to create a new feed. That will take you to the Feed Settings screen.
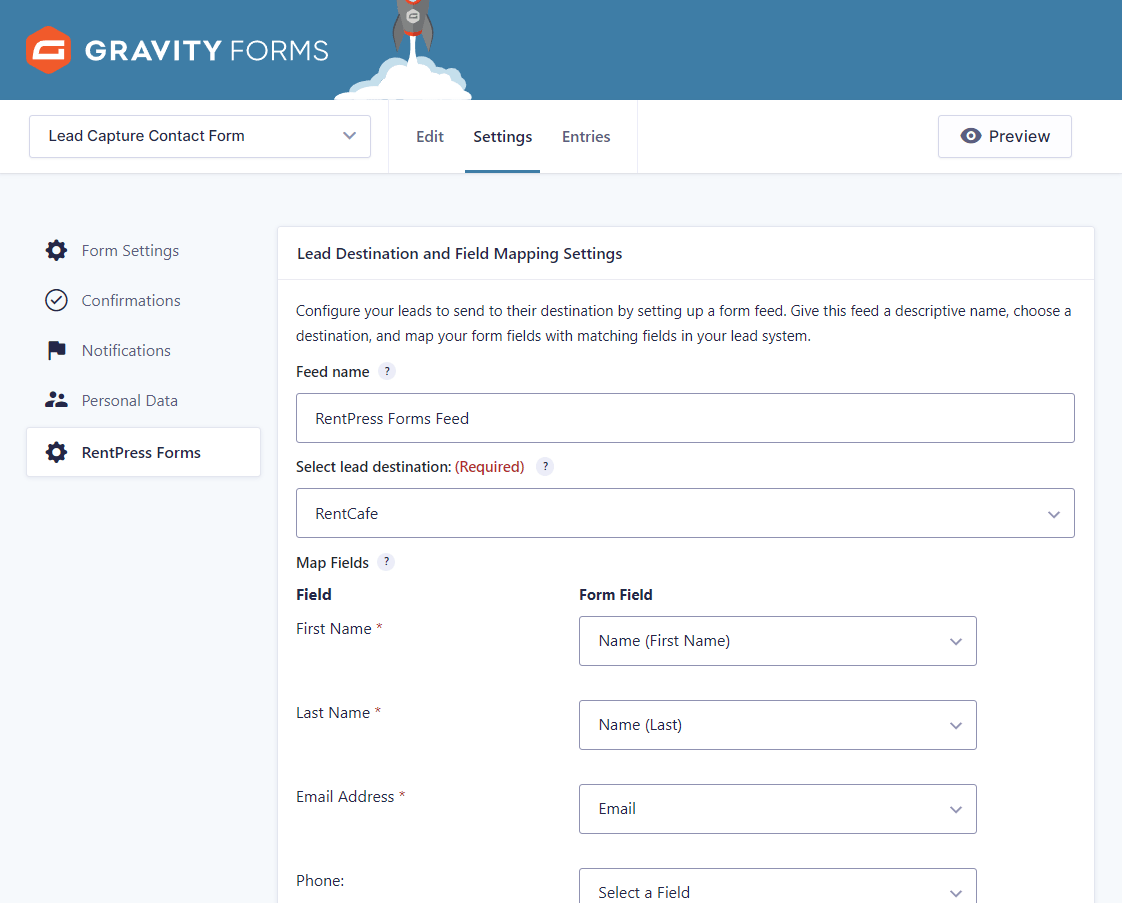
For each required field, click on the dropdown menu. If there is more than one option, select the one that relates to the Field on the left side of your screen. If your form doesn’t have a field that seems to match what your CRM wants, consider adding it. Once added, you will be able to select that field in the Feeds Settings menu. Once you have selected a Form Field for every Field that you want to send to your 3rd Party API, click the Update Settings button at the bottom of the screen.
Some of the options will already be filled in. This is because the plugin selects fields of the correct type by default, so if you use a Name field on your form, the plugin will automatically select the Name (First) option for First Name. The required fields for your import source will be denoted by asterisks (*). Make sure to check with your CRM to see all of the information that may be required to accept a lead.
And that’s it! You’re all set up. Every time someone submits the form(s) you have added feeds to, RentPress Forms will automatically send their data to your 3rd Party API.
Logging Settings
The Logging Settings section allows you to enable logging for form submissions and responses from lead destinations in the RentPress: Gravity Forms Add-on. This can help troubleshoot authentications issue or errors. Logs are stored in plugin files and are meant for troubleshooting only. They may contain sensitive information, so secure handling is crucial. After troubleshooting, delete the log files and disable these settings to resume normal operation.
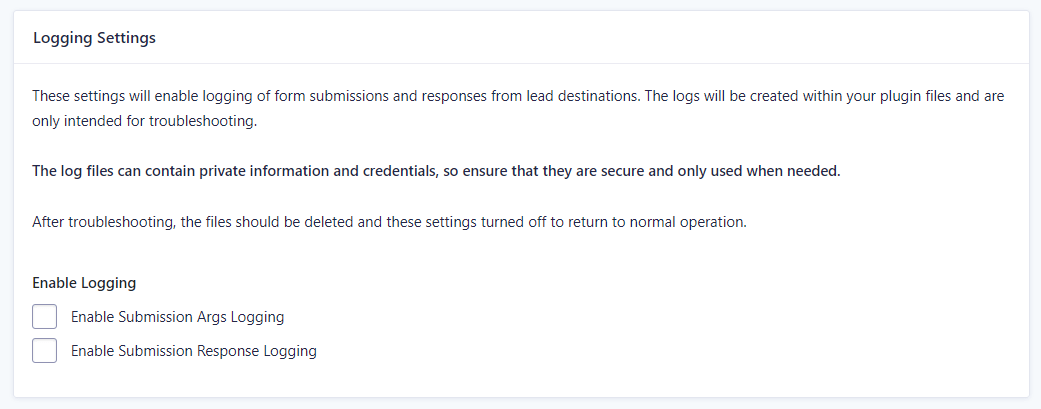
Options:
Enable Submission Args Logging: Logs form submission details.
Enable Submission Response Logging: Logs responses from lead destinations.
Log File Location:
File: rentpress_gravity_forms_logs.log
Path: /wp-content/plugins/rentpress-gravity-forms-add-on/rentpress_gravity_forms_logs.log
Tips
- When using RentPress’s included templates, you will see URLs parameters to help pre-populate form fields. When known, you will see values of
- property_code
- floorplan_code
- floorplan_bed
- unit_code
- See this example » that displays fields that are usually hidden.
- More info » from Gravity Forms about dynamically populating fields
- On a default configuration, RentPress’s included templates will send shoppers to a /contact/ page on your site where it is expected that you have added a form.
- This /contact/ URL can be set across your entire website in RentPress Settings > Appearance > Default URLs
- The contact URL can be set on a per-property basis in the Contact Form section of the Property Editor.
See Also
- Gravity Forms documentation ↗️
- RentPress templates “Request Info” button and Default URLs
- Property Editor > Contact Forms
Important:
Information about products not created by 30 Lines is provided for information purposes only and does not constitute a recommendation or endorsement. Please contact the vendor for additional information.